It’s time to install the LiFePO4 batteries on my boat!
In my previous posts I explained that LiFePO4 (Lithium Iron Phosphate) batteries have gained popularity among boat owners as an efficient and reliable power source. These batteries offer numerous advantages over traditional lead-acid batteries, such as longer life, faster charging, and better performance. In this blog post, I’ll discuss the process of selecting and installing LiFePO4 batteries on a boat, using my own experience as a guide.
Choosing the Right Format for Your LiFePO4 Batteries

LiFePO4 batteries come in various formats, so it’s essential to choose one that fits the available space on your boat. In my case, I had six lead-acid batteries on my boat, and I decided to replace five of them with LiFePO4 batteries to serve as the service bank. The sixth battery, which serves as the engine starter battery, remains a lead-acid battery due to its specific starting characteristics.
When selecting LiFePO4 batteries, I found that the space previously occupied by the five lead-acid batteries was more than enough to install LiFePO4 batteries with 3 times greater capacity. However, it’s crucial to choose a format that suits the available space and form factor on your boat. In my case, I opted for two LiFePO4 batteries in format 520 x 240 x 220 (LxBxH) in mm, each with a 460Ah capacity and a 12V output.
Once you’ve chosen the appropriate format for your LiFePO4 batteries, the next step is installation. The five lead-acid batteries on my boat were housed in an aluminum box, which I repurposed to accommodate the two new LiFePO4 batteries.
Positioning the LiFePO4 Batteries in the Boat
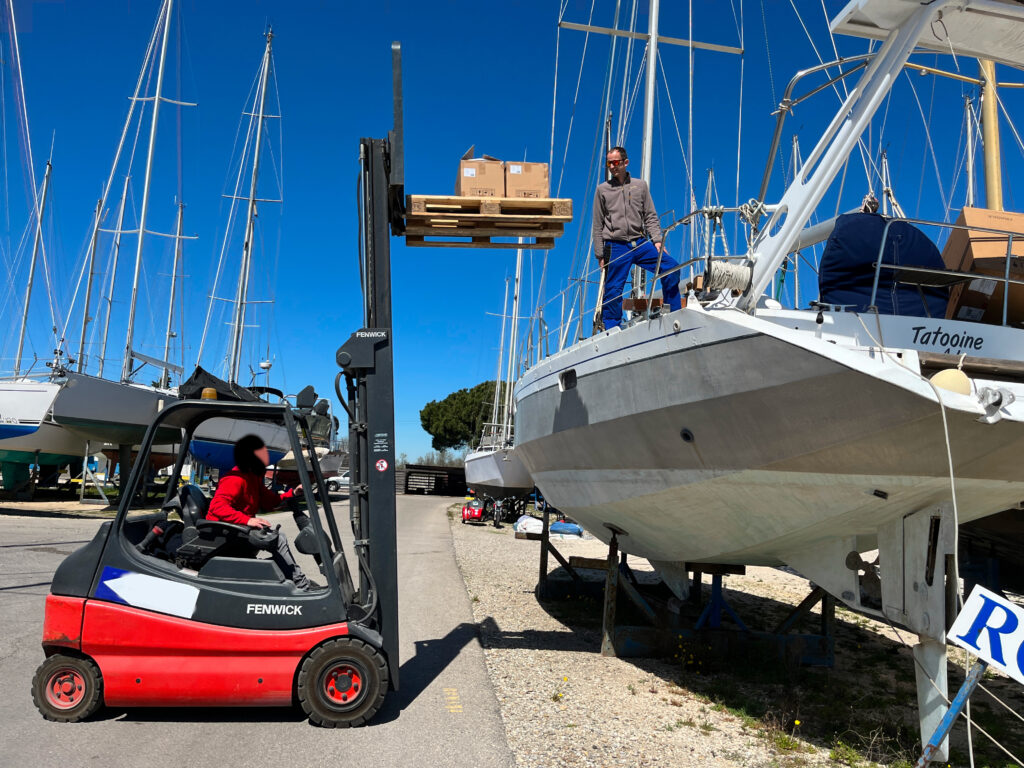
While LiFePO4 batteries are generally lighter than lead-acid batteries in terms of volume, they can still be quite heavy and challenging to maneuver. In my case, each LiFePO4 battery weighed 39.5kg. When it came to transporting and positioning the new batteries on my boat, I considered two possible methods:
- Lifting the batteries using a rope attached to the mast
- Asking someone with a forklift to help with the task
Ultimately, I found that enlisting the help of a forklift operator was the easiest and safest solution for moving the LiFePO4 batteries onto the boat.
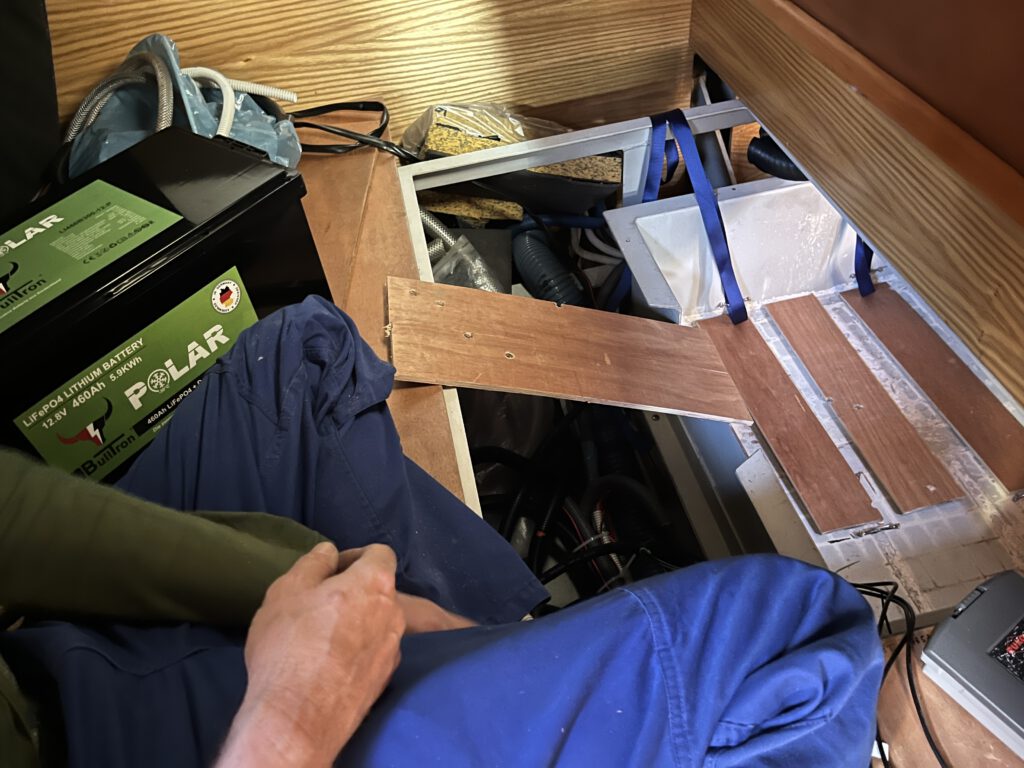
Due to the LiFePO4 batteries’ larger size compared to the previous lead-acid batteries, some modifications were necessary to fit them into the existing aluminum box. We had to cut a side of the box to create enough space for the new batteries to slide in. Once this was done, sliding the LiFePO4 batteries into the compartment proved to be a simple and straightforward process.
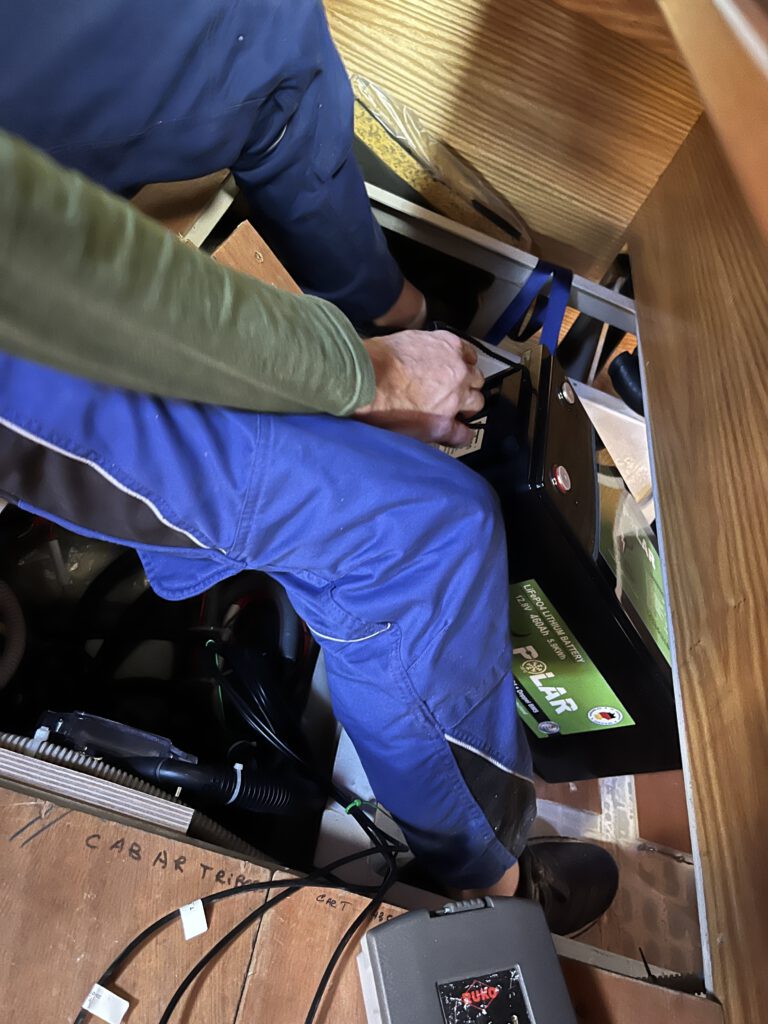
Keep in mind that when positioning your LiFePO4 batteries, it’s essential to ensure they are secure. Secure placement will prevent any potential damage or shifting during boat movement.
Securing the Batteries for Safe and Stable Operation
Given that boats are constantly subjected to movement and vibrations from waves and wind, it’s crucial to ensure your batteries are securely fastened in place. This prevents them from shifting or becoming damaged while cruising.
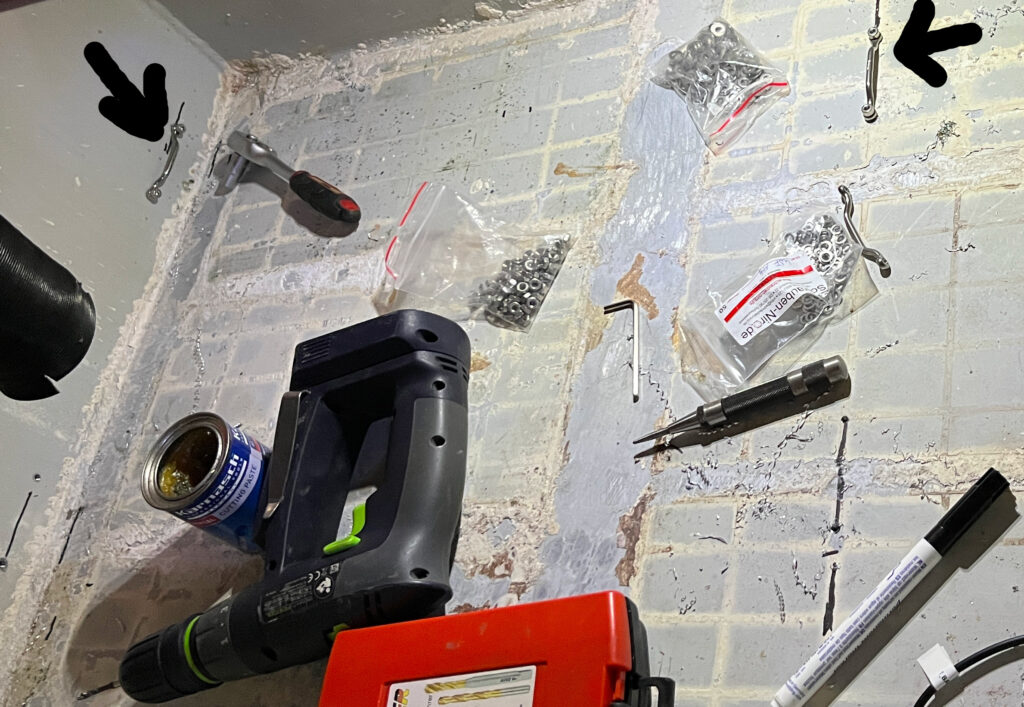
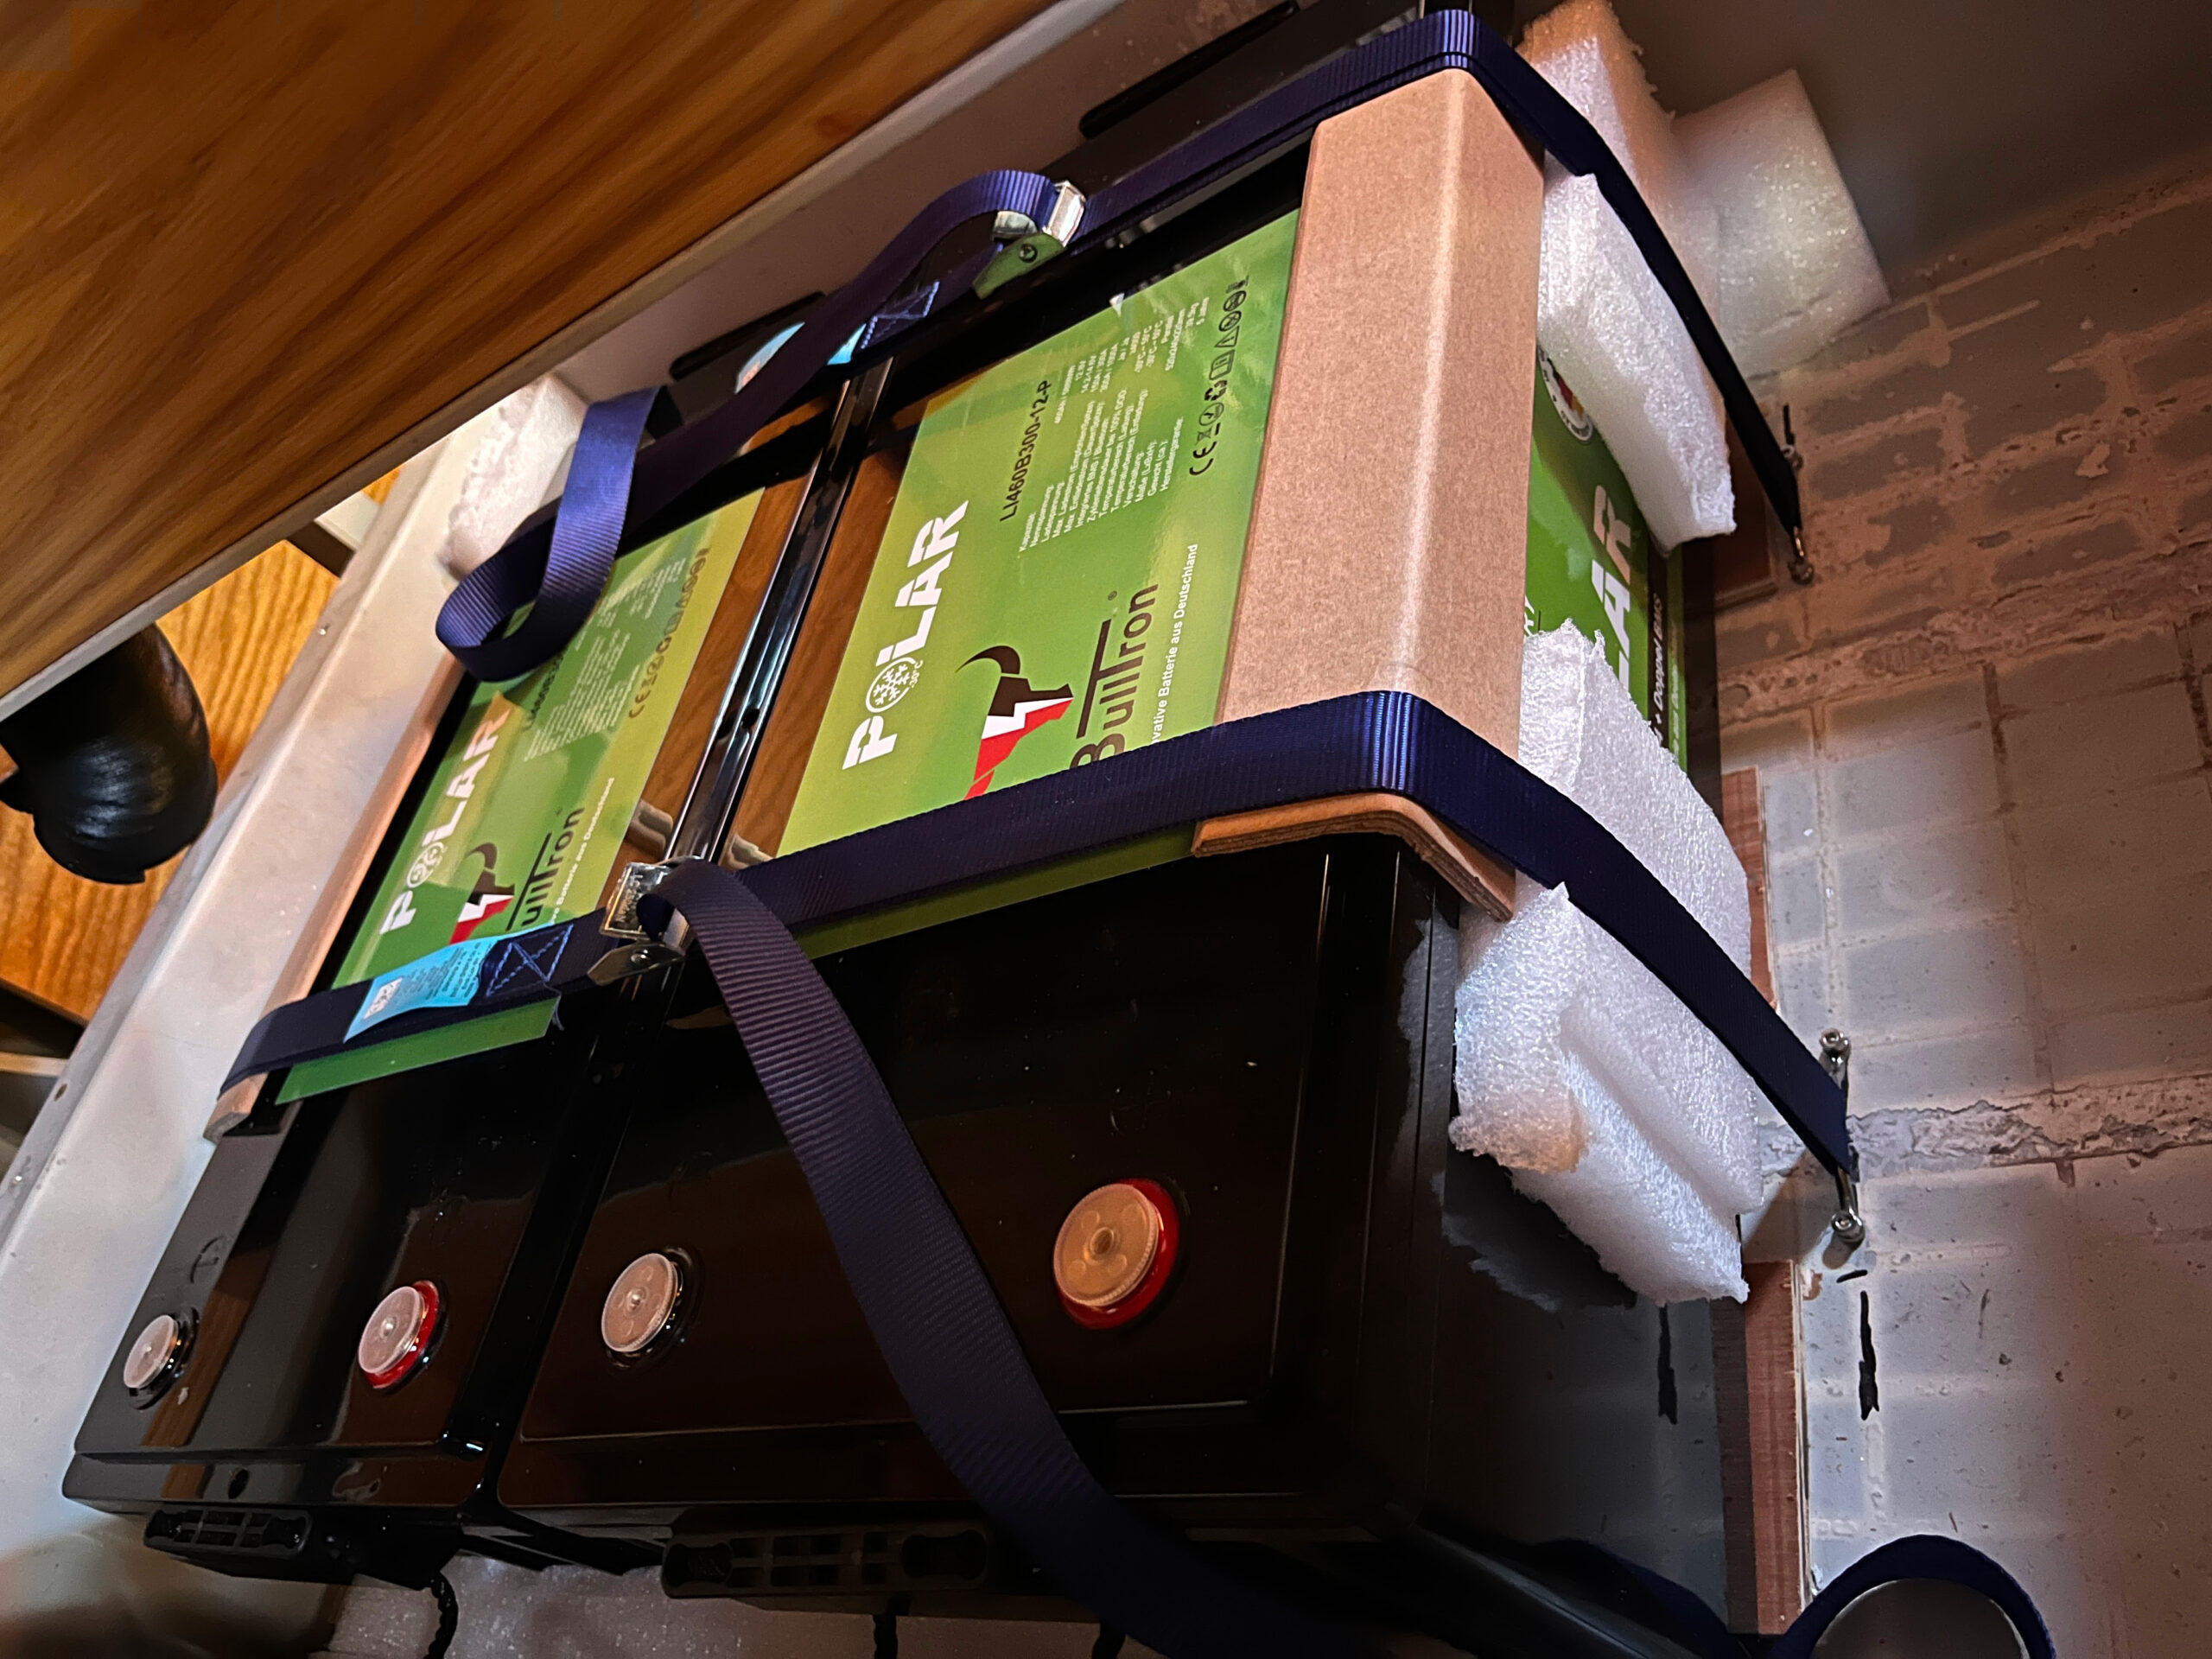
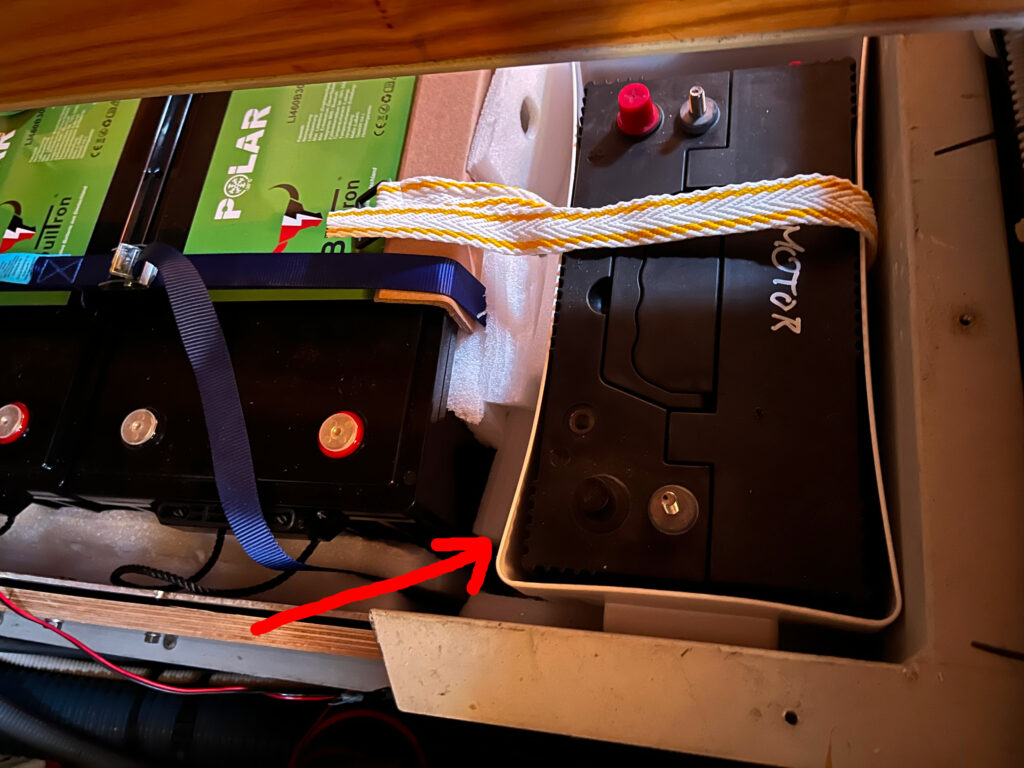
To secure the LiFePO4 batteries in the aluminum box, we installed four attachment points – two on one side and two on the bottom. With these points in place, we then fastened the batteries using two sturdy belts, which ensured they wouldn’t budge during the boat’s motion.
On the side of the batteries, we added a protective cover, although its necessity was somewhat debatable, as the batteries appeared stable and immobile after being secured with the belts.

As for the remaining lead-acid battery designated for the engine, we placed it back in the available space within the aluminum box. However, before doing so, we housed it in a plastic battery box to provide an extra layer of protection against potential overheating and leakage. This precautionary measure ensures that the lead-acid battery won’t negatively impact the new LiFePO4 batteries in case of any malfunctions.
Conclusion
In conclusion, we’ve successfully completed the first part of our boat’s power source upgrade by selecting, installing, and securing the LiFePO4 batteries along with the remaining lead-acid battery.
Please note that the information shared in this blog post is based on our personal experience and serves as an example of how we installed and connected LiFePO4 batteries on our boat. This should not be considered professional advice. Every boat’s electrical system is unique, and the steps mentioned may not be applicable to your specific situation.
We strongly recommend consulting with a professional electrician or a marine electrical specialist before attempting any battery installation or connection on your boat. They can provide expert guidance tailored to your boat’s needs, ensuring a safe and efficient power source upgrade.
Remember, it’s always better to seek professional help to avoid any potential issues or damage to your boat’s electrical system.
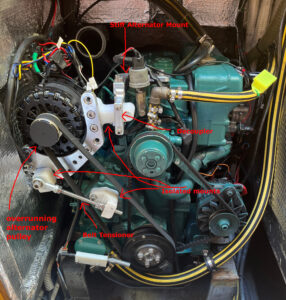
Stay tuned for my next blog post, where I’ll dive deeper into the process of connecting the LiFePO4 batteries and lead-acid battery to your boat’s electrical system, ensuring optimal performance and safety. We’ll also explore other related topics, such as implementing a powerful alternator and regulator for the LiFePO4 batteries.


If you followed me to the end of this blog this is for you:
For readers who enjoy hiking and yoga, Tshirts
at Le Coeur Vert Boutique

![Read more about the article How to choose an alternator to charge lithium batteries (LiFePO4)? [my technical thoughts]](https://sv-tatooine.com/wp-content/uploads/2023/02/20210521-095528_IPhone7_IMG_2648-300x251.jpg)