In this blog post, we will explore the process of installing a Balmar alternator and Wakespeed regulator to charge your LifePO4 batteries. If you have already installed your LifePO4 (Lithium Iron Phosphate) batteries on your boat, congratulations! You are now on your way to enjoying the benefits of these high-performance energy storage systems. However, to make the most of your LifePO4 batteries, you need to ensure that they are charged efficiently and safely. In a previous post, I shared my thoughts on choosing the right alternator for your LifePO4 batteries, which you can find here: How to Choose an Alternator to Charge Lithium Batteries (LiFePO4) – My Technical Thoughts
Now, let’s dive into the installation process!
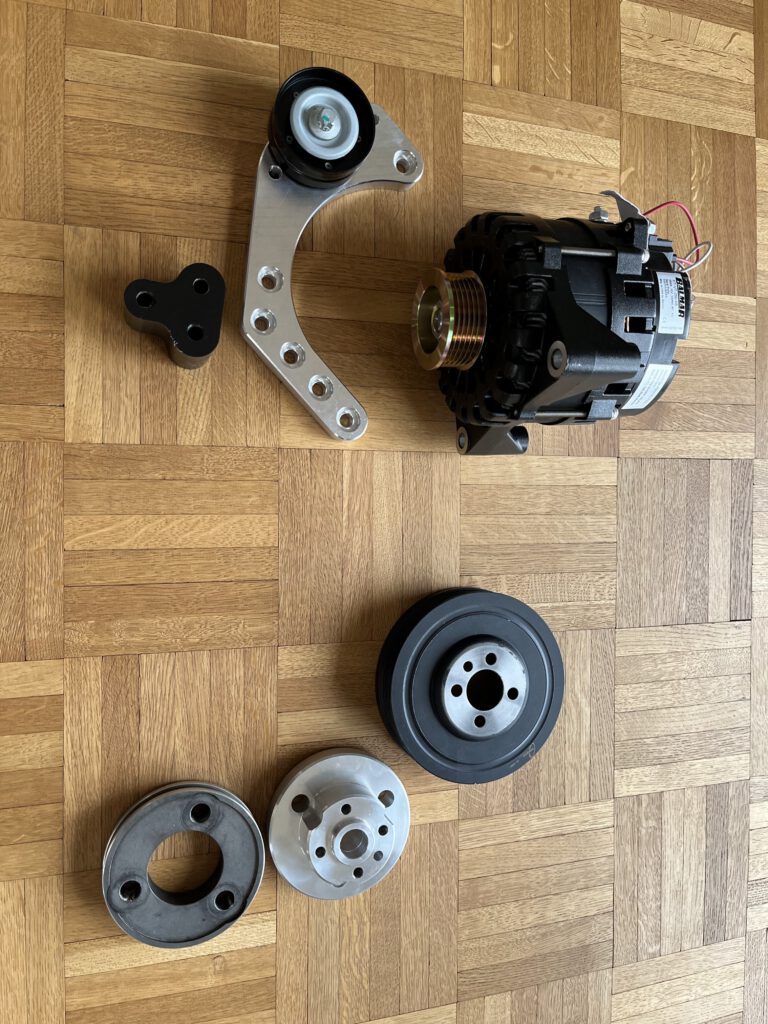
Step 1: Preparing the Components 🔧🔋
Step 1: Preparing the Components 🔧🔋 Before starting the installation, I made sure I had all the necessary tools and components. I received the Balmar alternator and Wakespeed regulator at home, which were the main components for this project. Additionally, I gathered the following items:
- K6 flat belt
- Aluminum alternator support
- Polyoxymethylene (POM) connecting parts for alternator isolation
- Wiring, connectors,…
- Wrench set
- Screwdrivers
- Wire cutters and strippers
- Multimeter
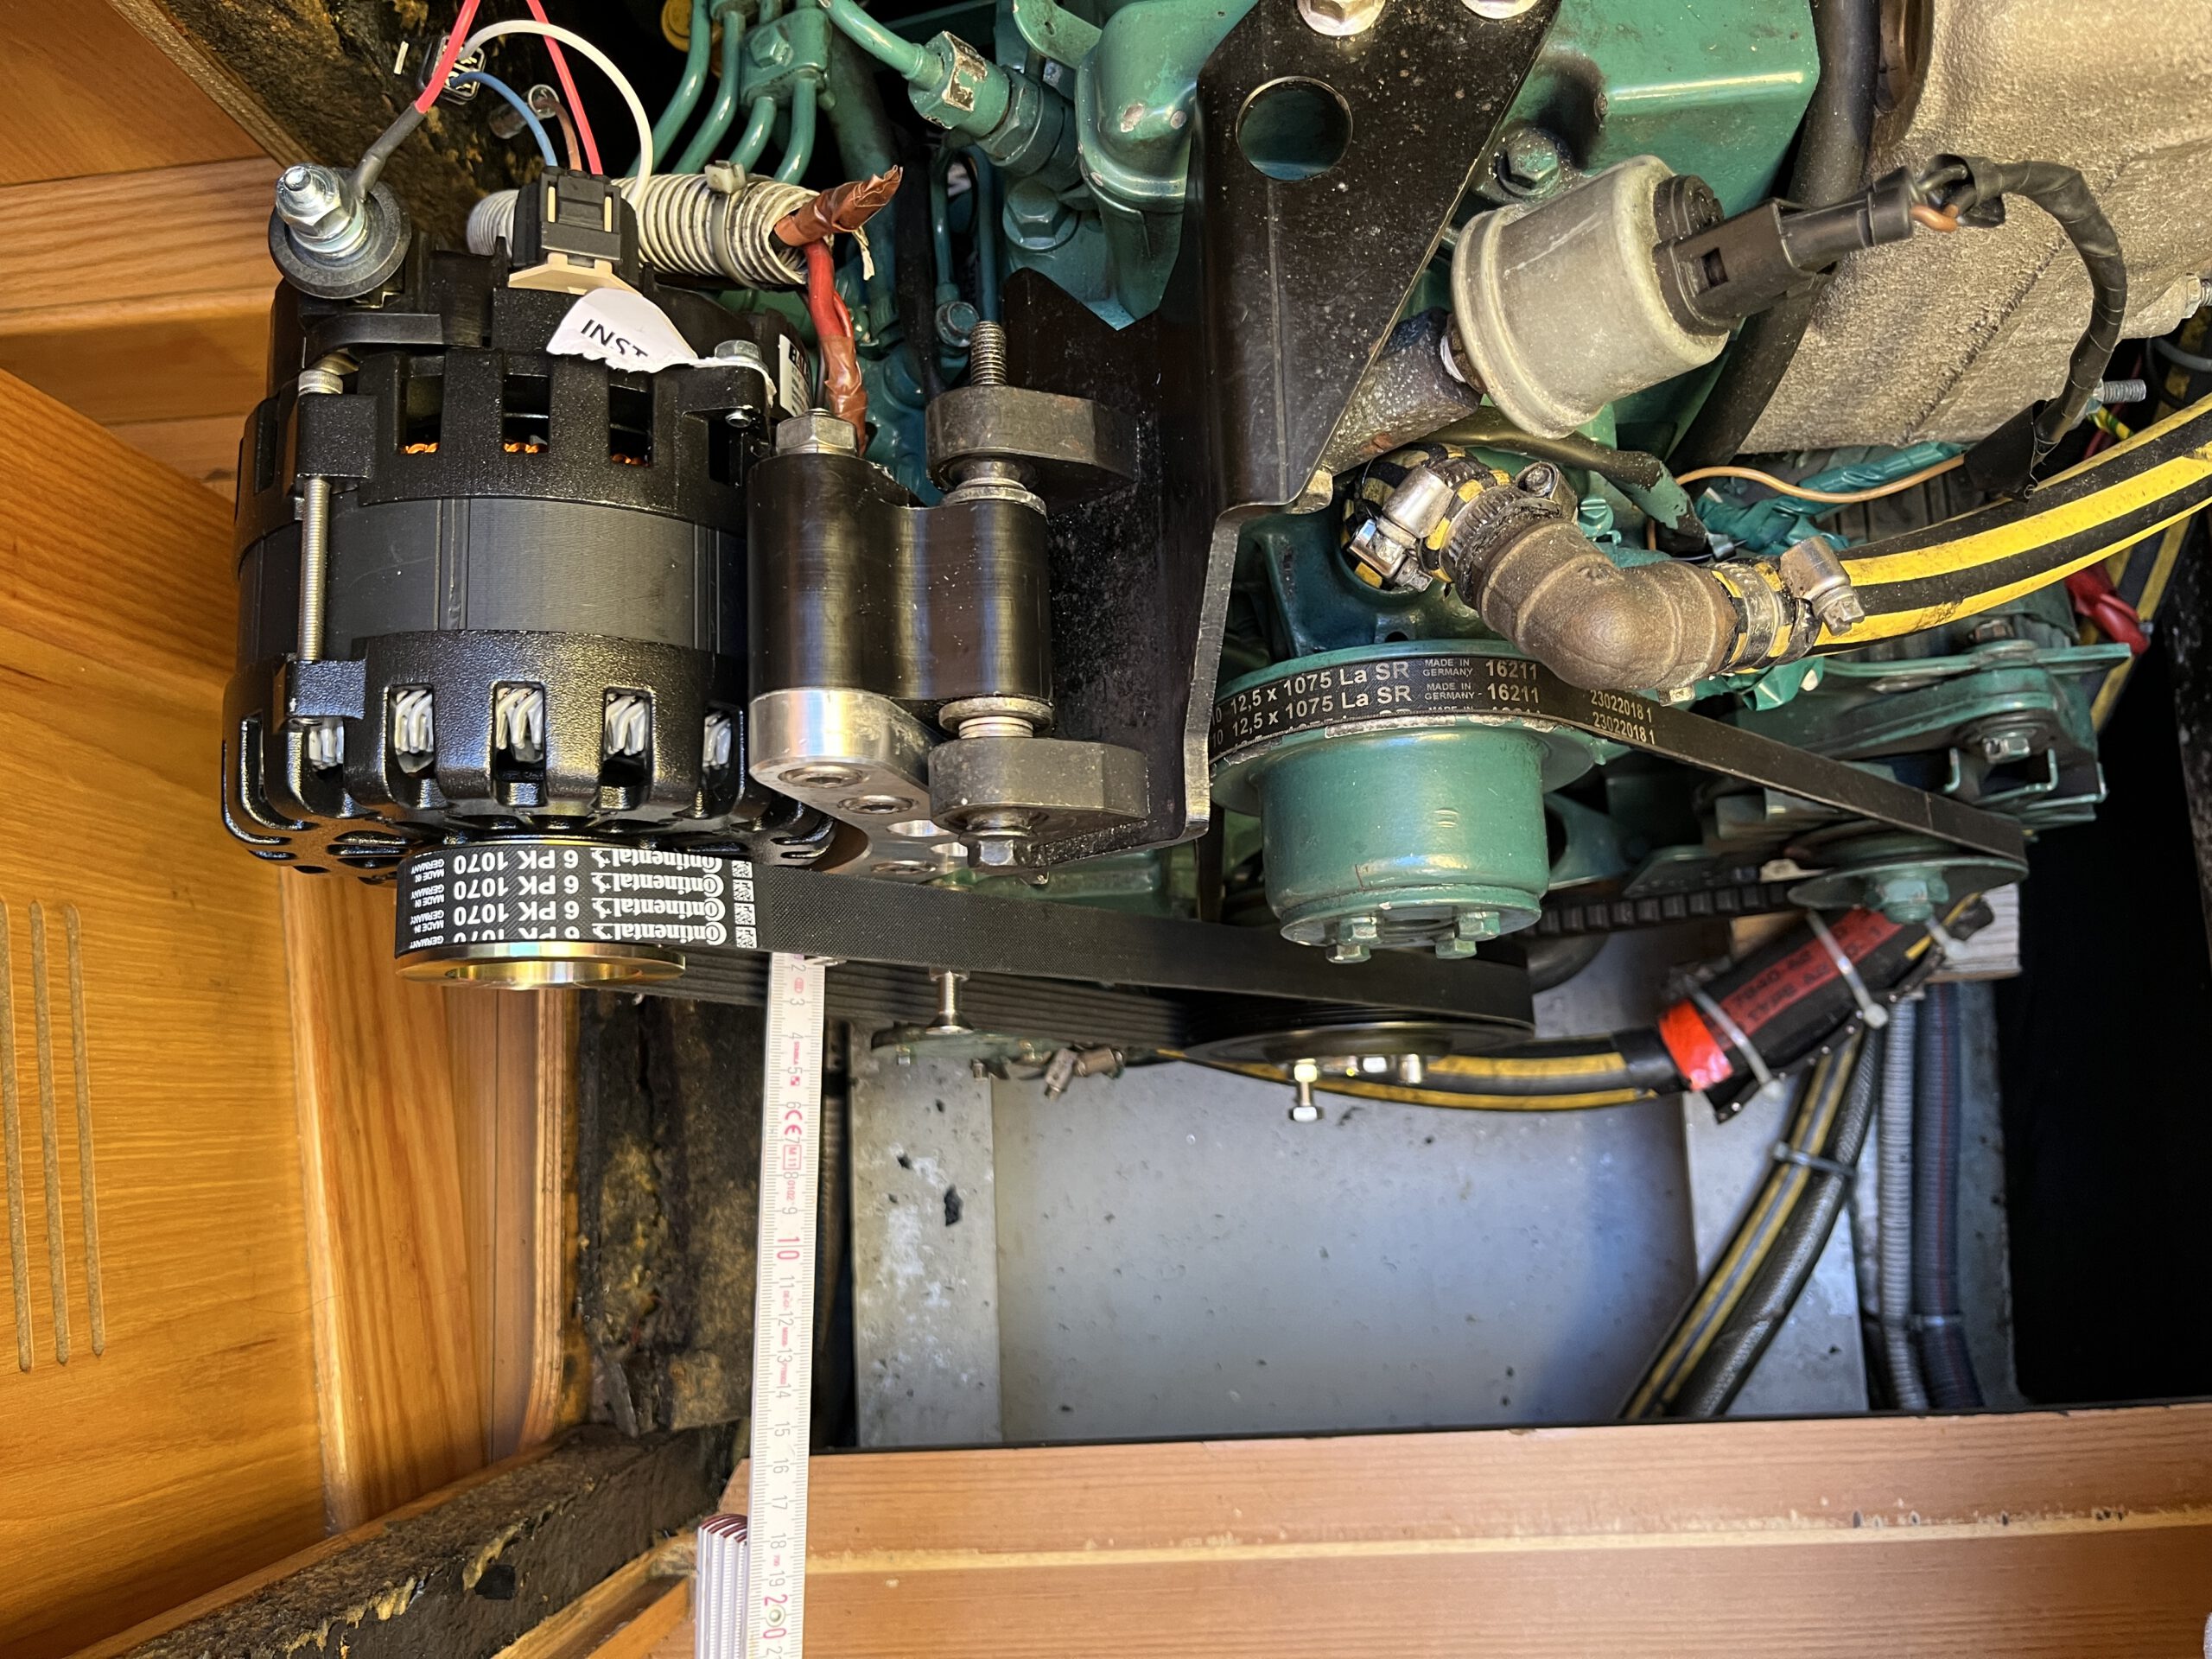
Step 2: Upgrading the Belt and Drive System ⚙️
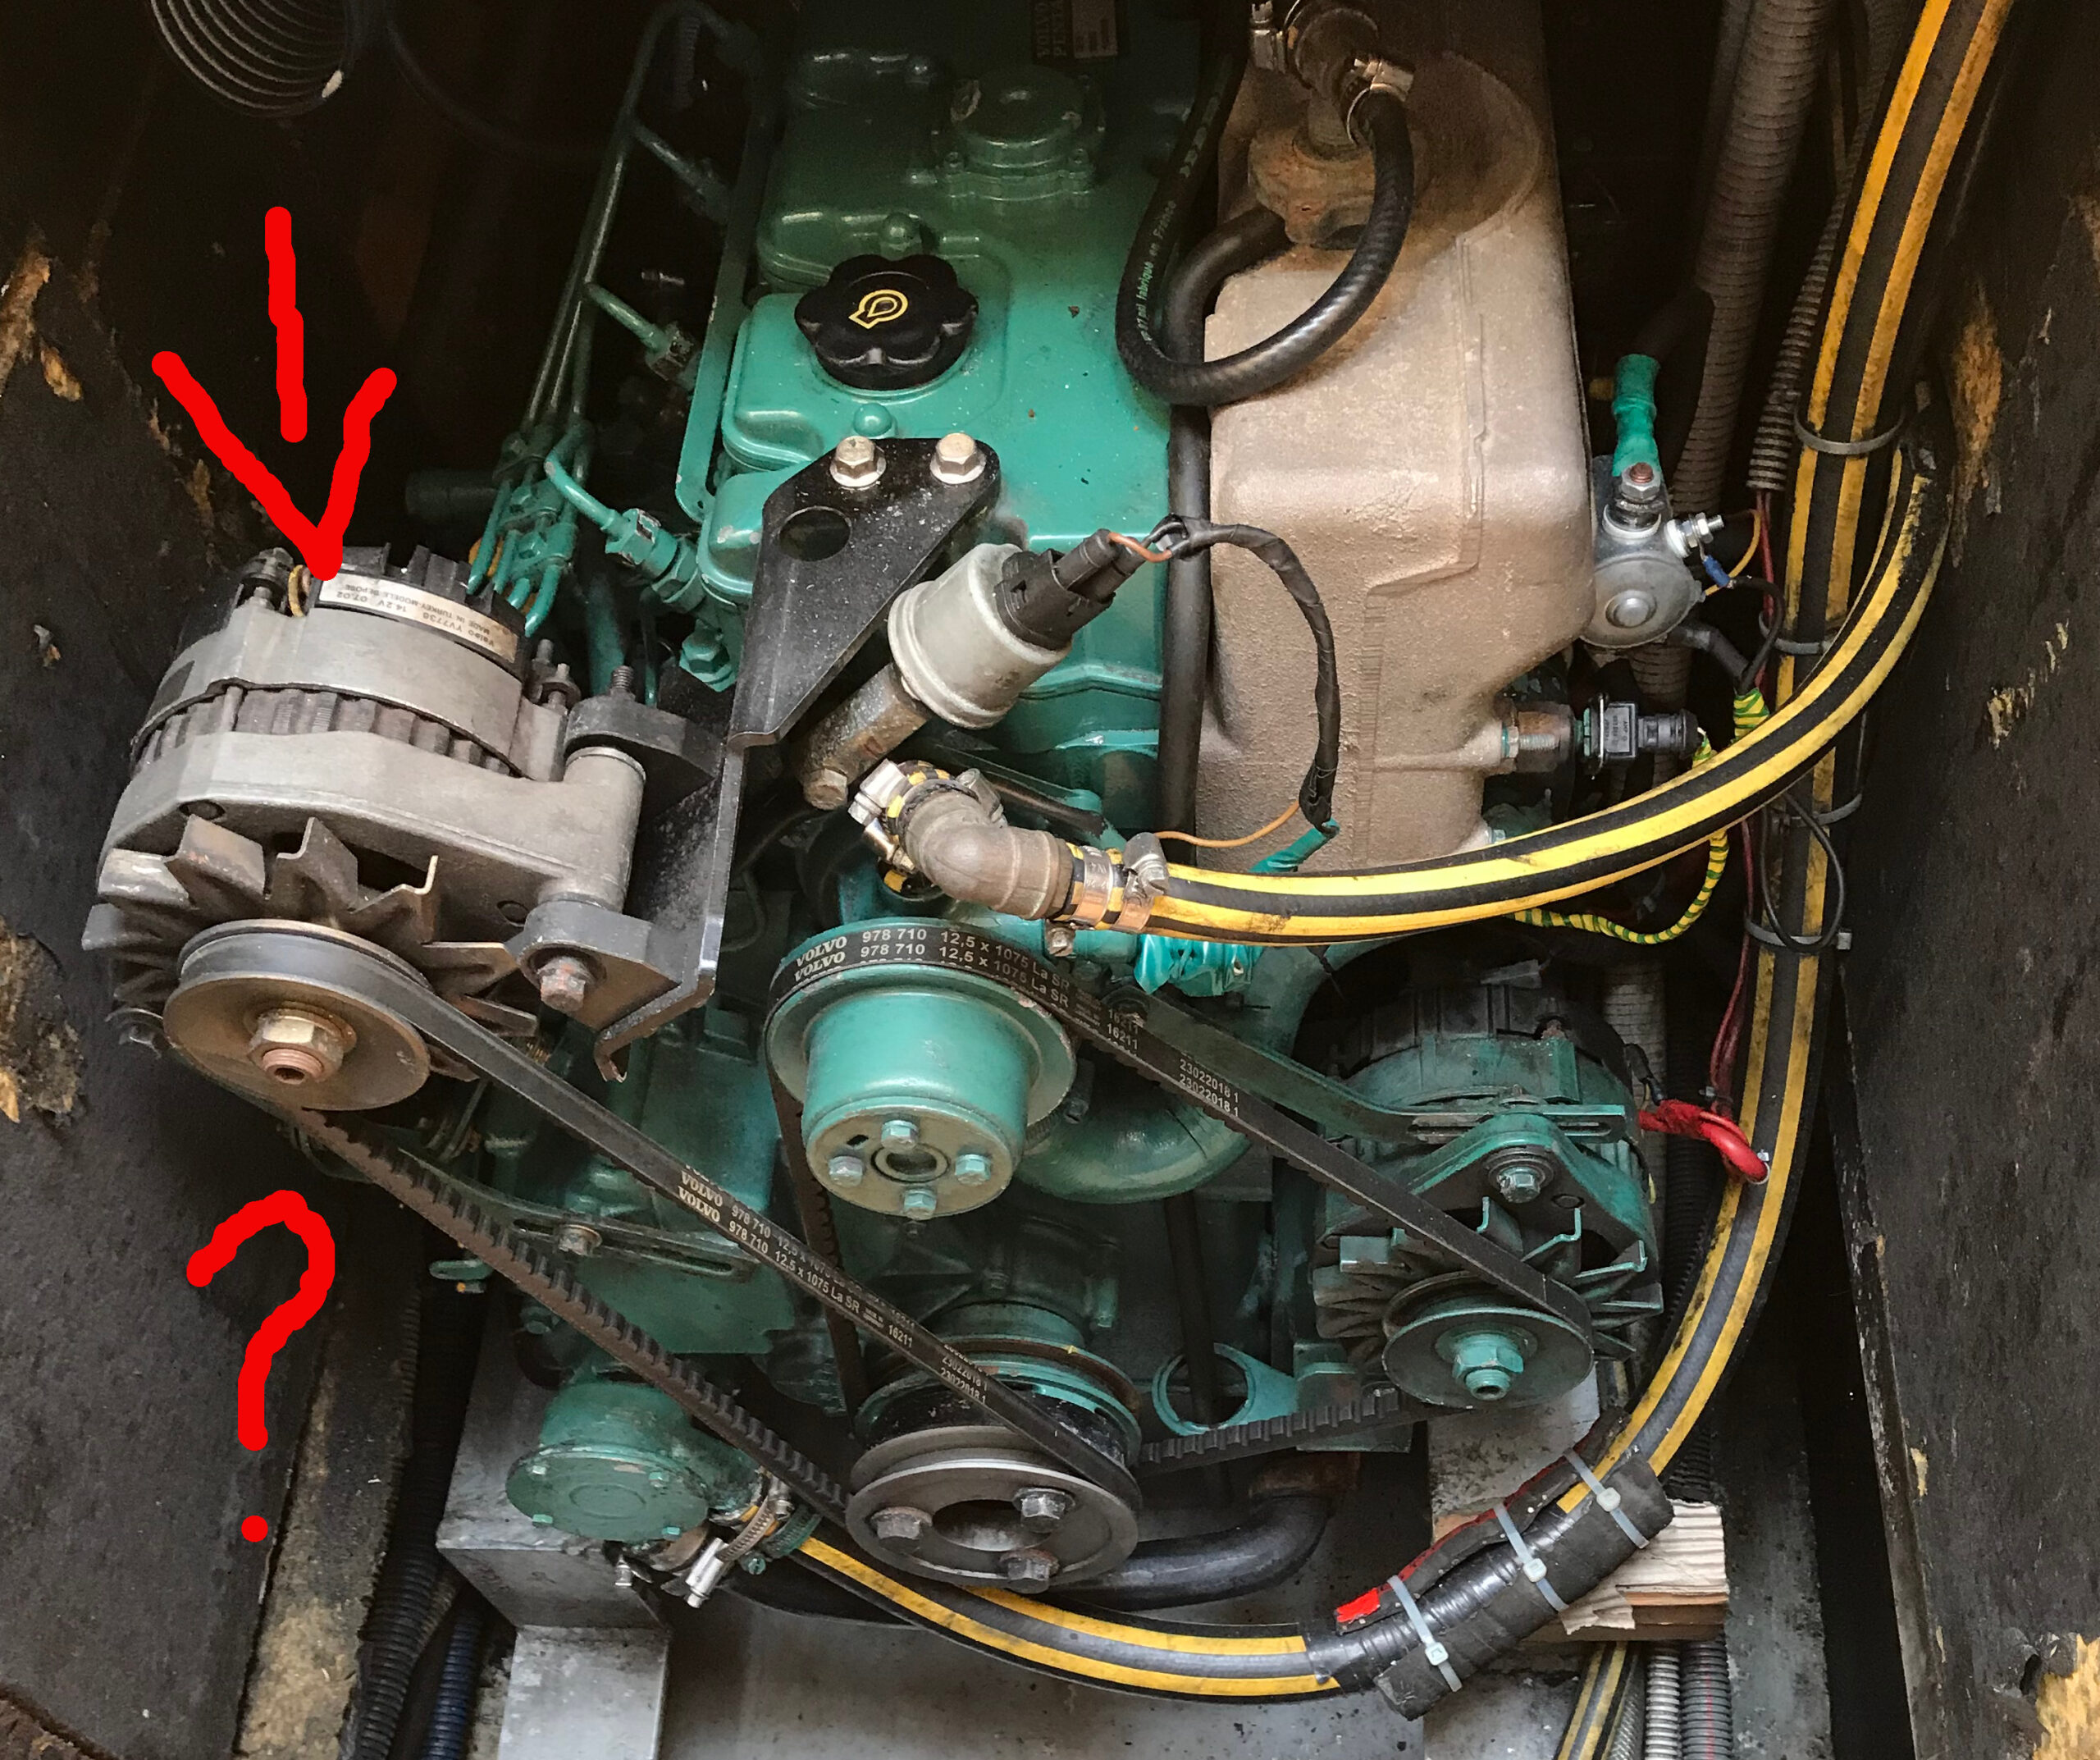
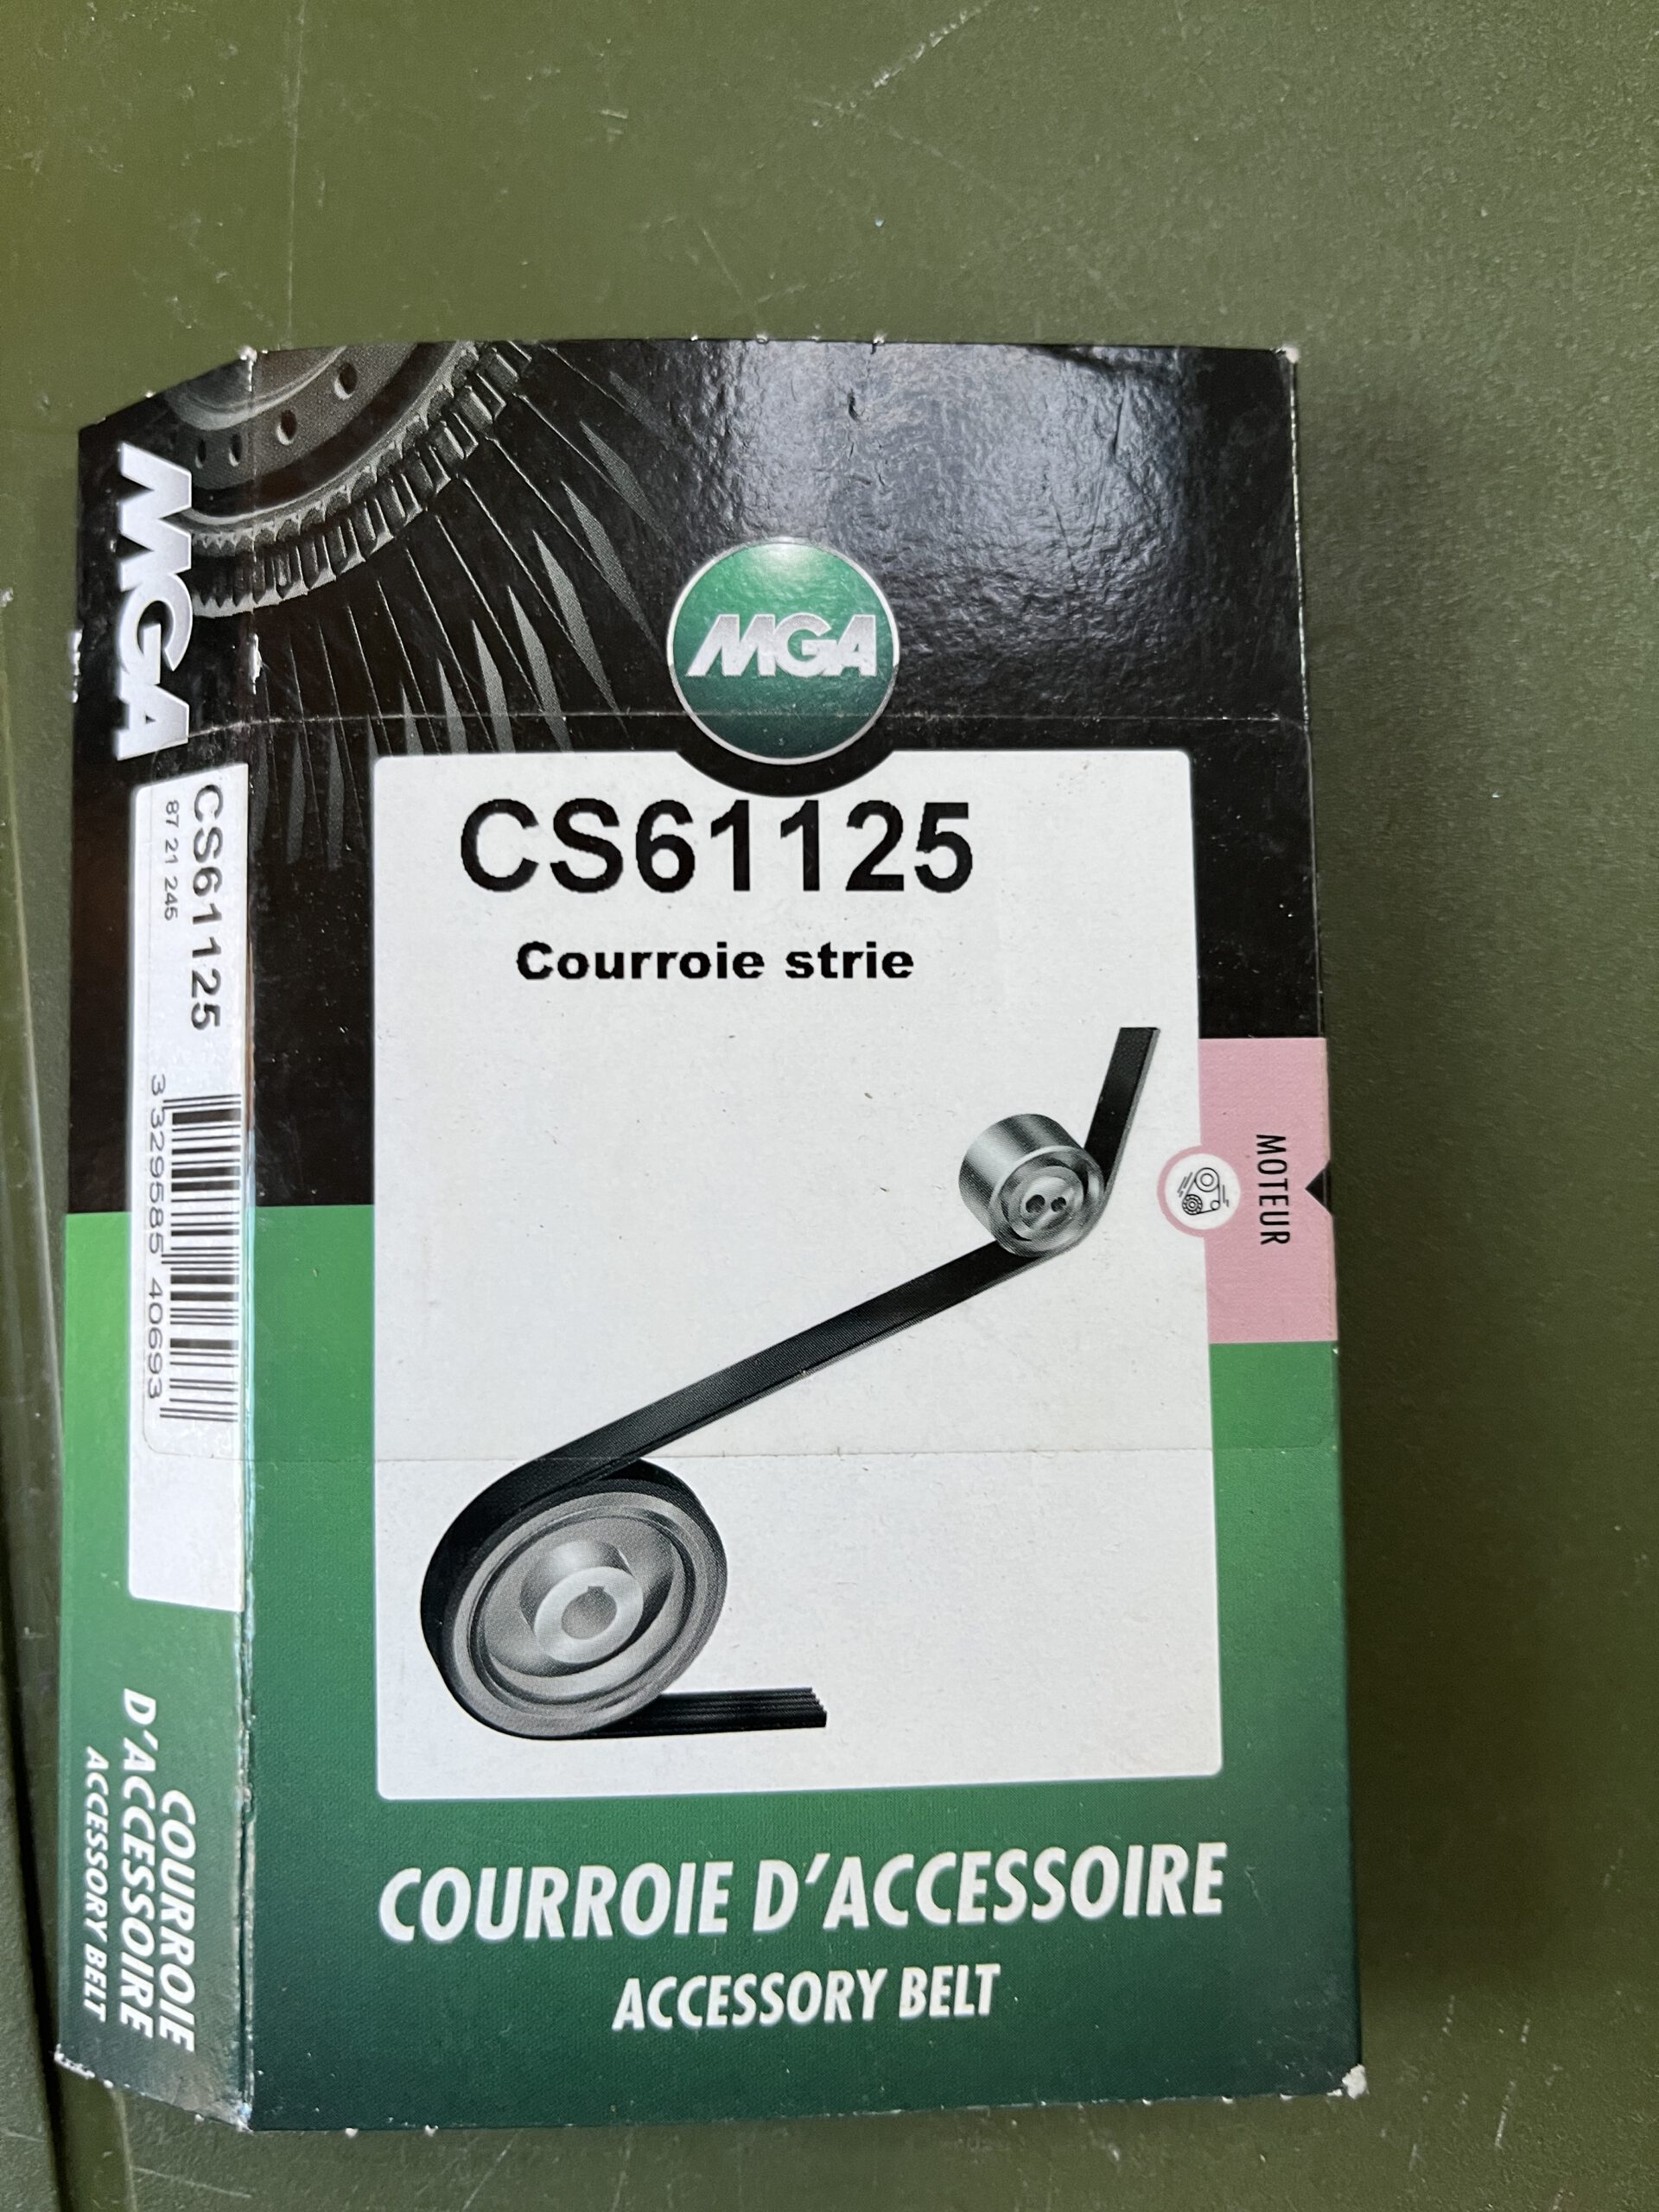
I realized that the Balmar alternator’s output of up to 4kW required a more robust belt than my boat’s existing one. I replaced the old belt with a K6 flat belt, similar to those used in car engines. I also changed the drive of the belt to achieve a speed ratio of 2.3 between the alternator and diesel engine.
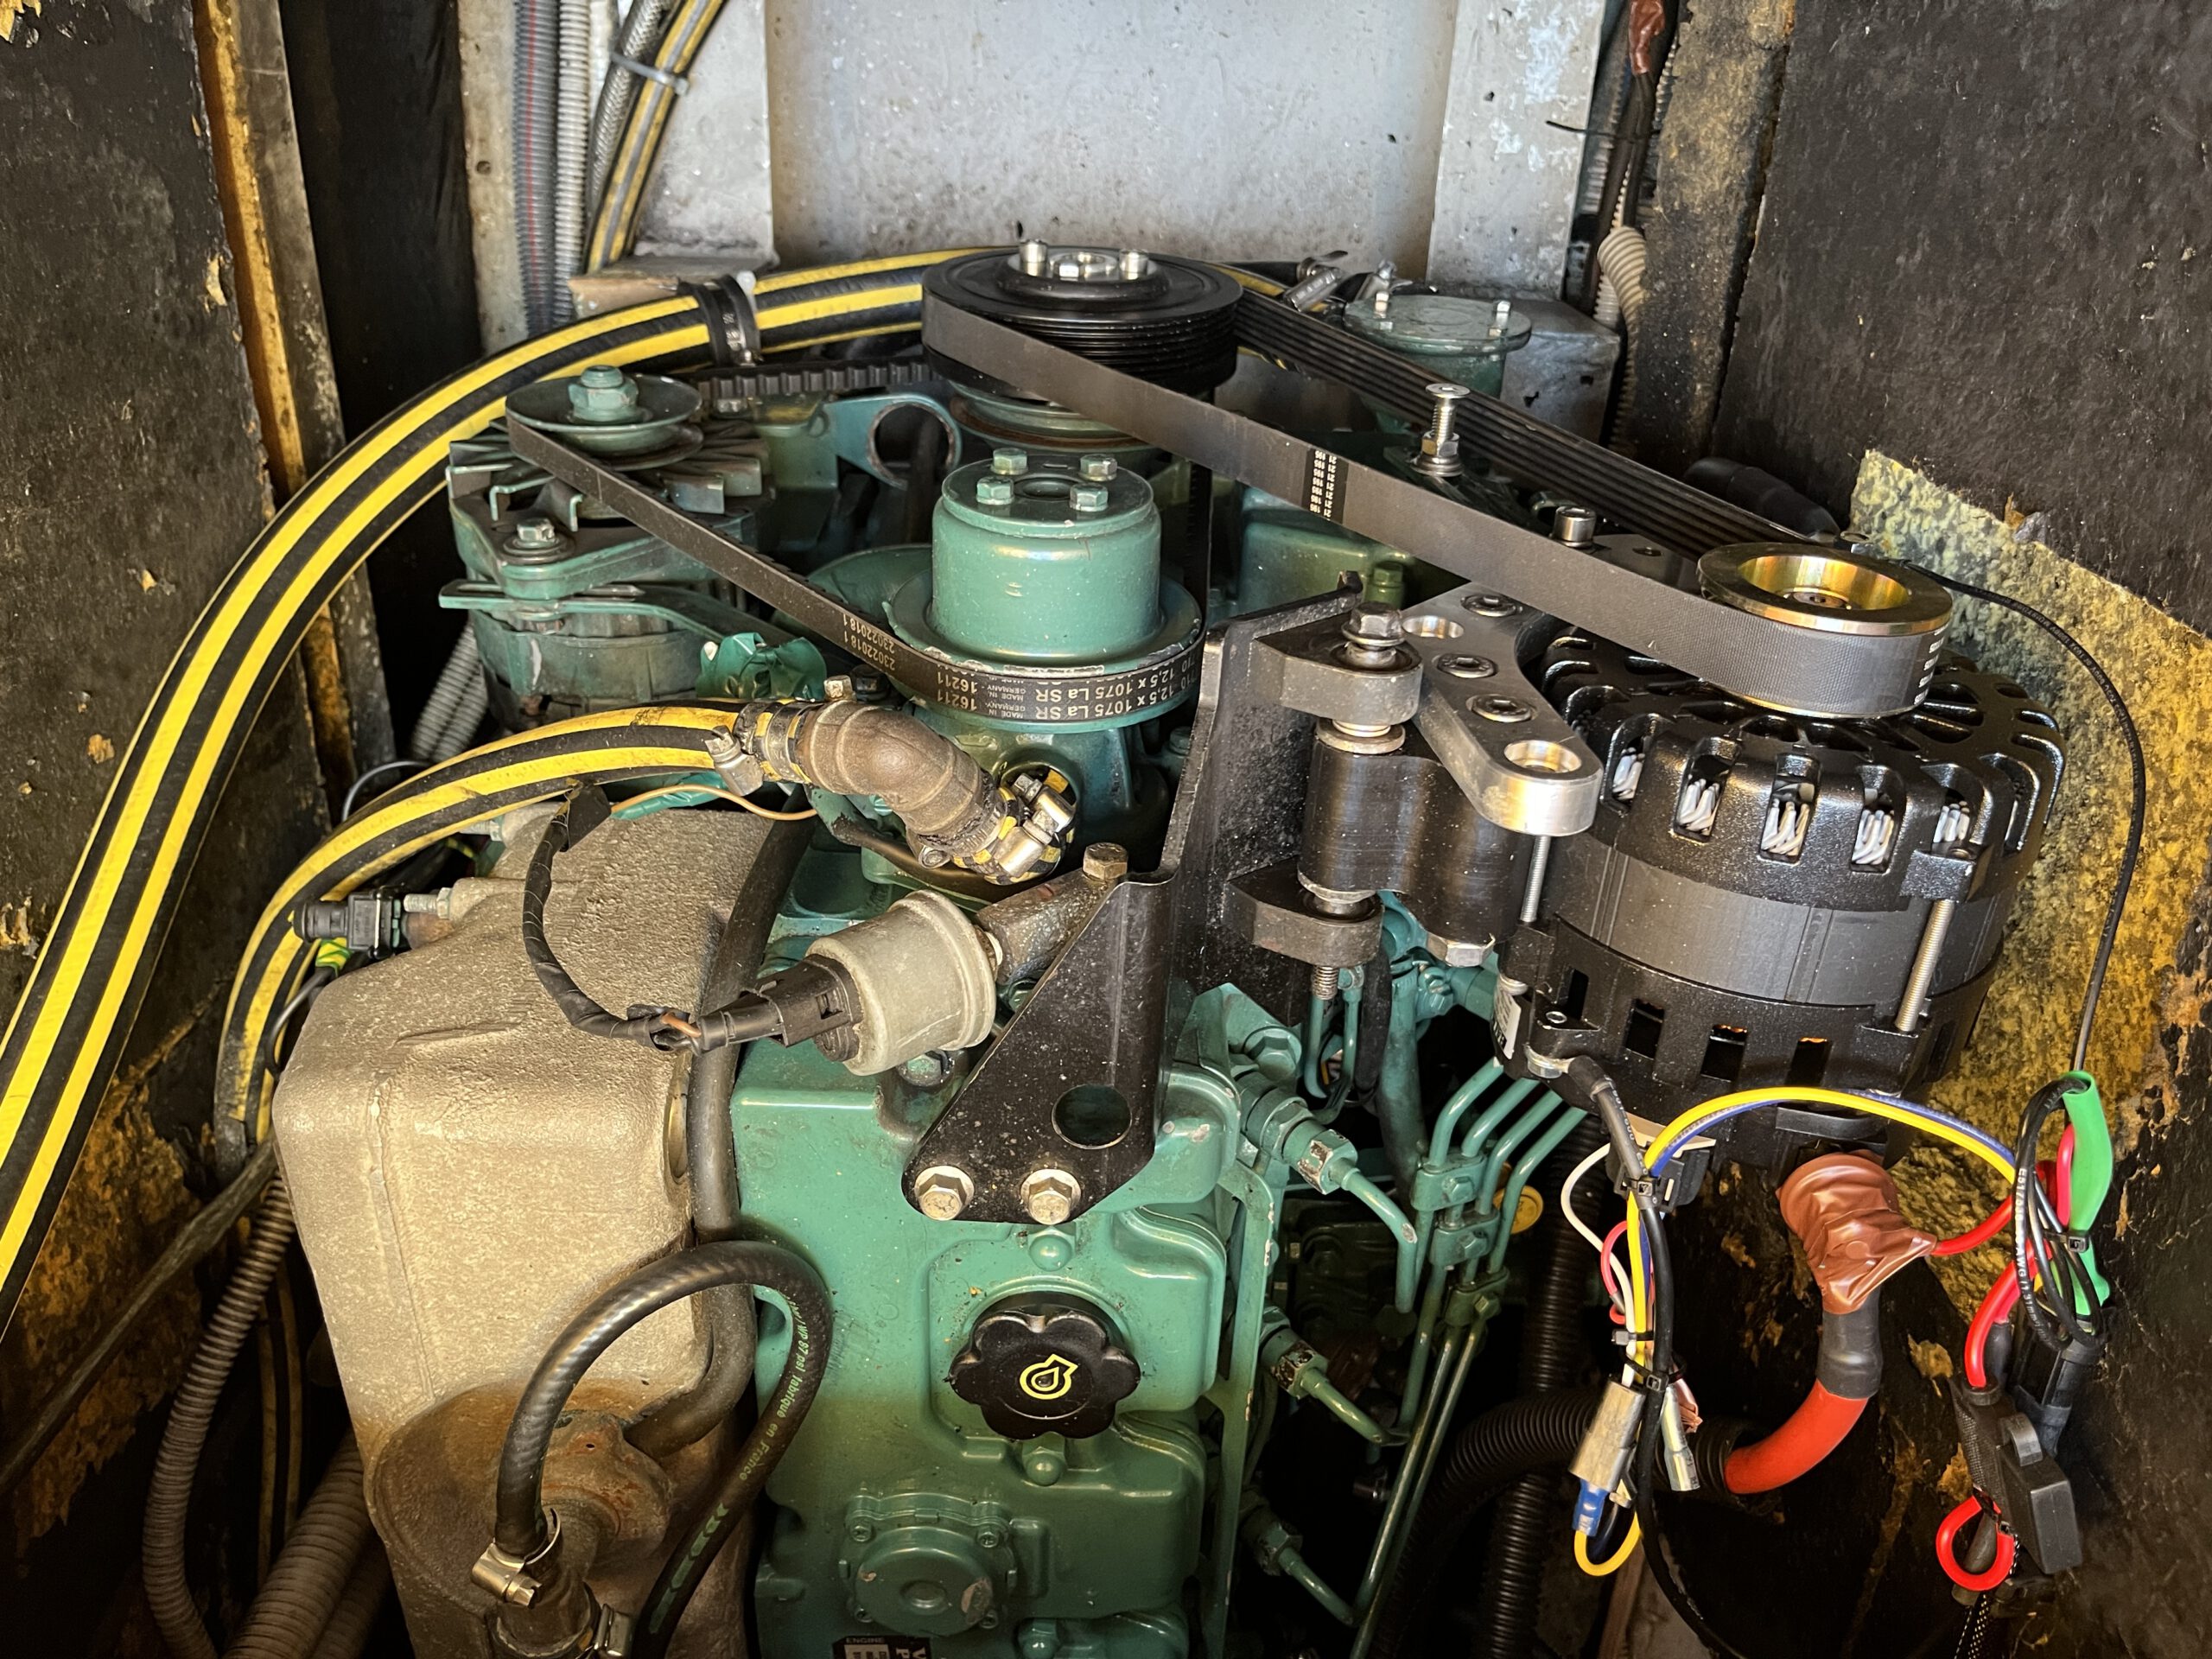
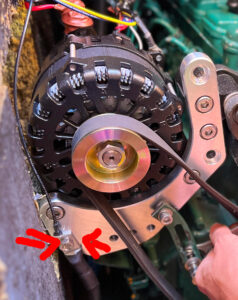
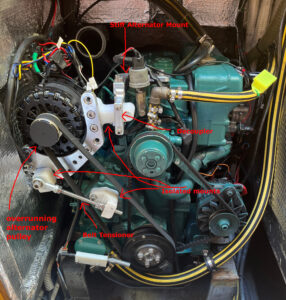
Step 3: Creating an Aluminum Support for the Alternator 🛠️
To mount the alternator on the engine, I designed a custom aluminum support that fit my engine and alternator’s dimensions. I fabricated this support and ensured it was sturdy enough to hold the alternator in place.
Step 4: Isolating the Alternator ⚡

My boat is made of aluminum, and the Balmar alternator is not internally isolated. To prevent any potential issues, I mounted the alternator on Polyoxymethylene (POM) connecting parts, which isolated it from the engine.
Since my engine lacks a belt tensioner, I needed to manually adjust the position of the alternator to achieve sufficient belt tension. Additionally, the adjusting component must be made of insulating material, as it also connects the alternator to the engine. I plan to address this aspect later, as I have not yet completed the fabrication of the insulating adjusting part.
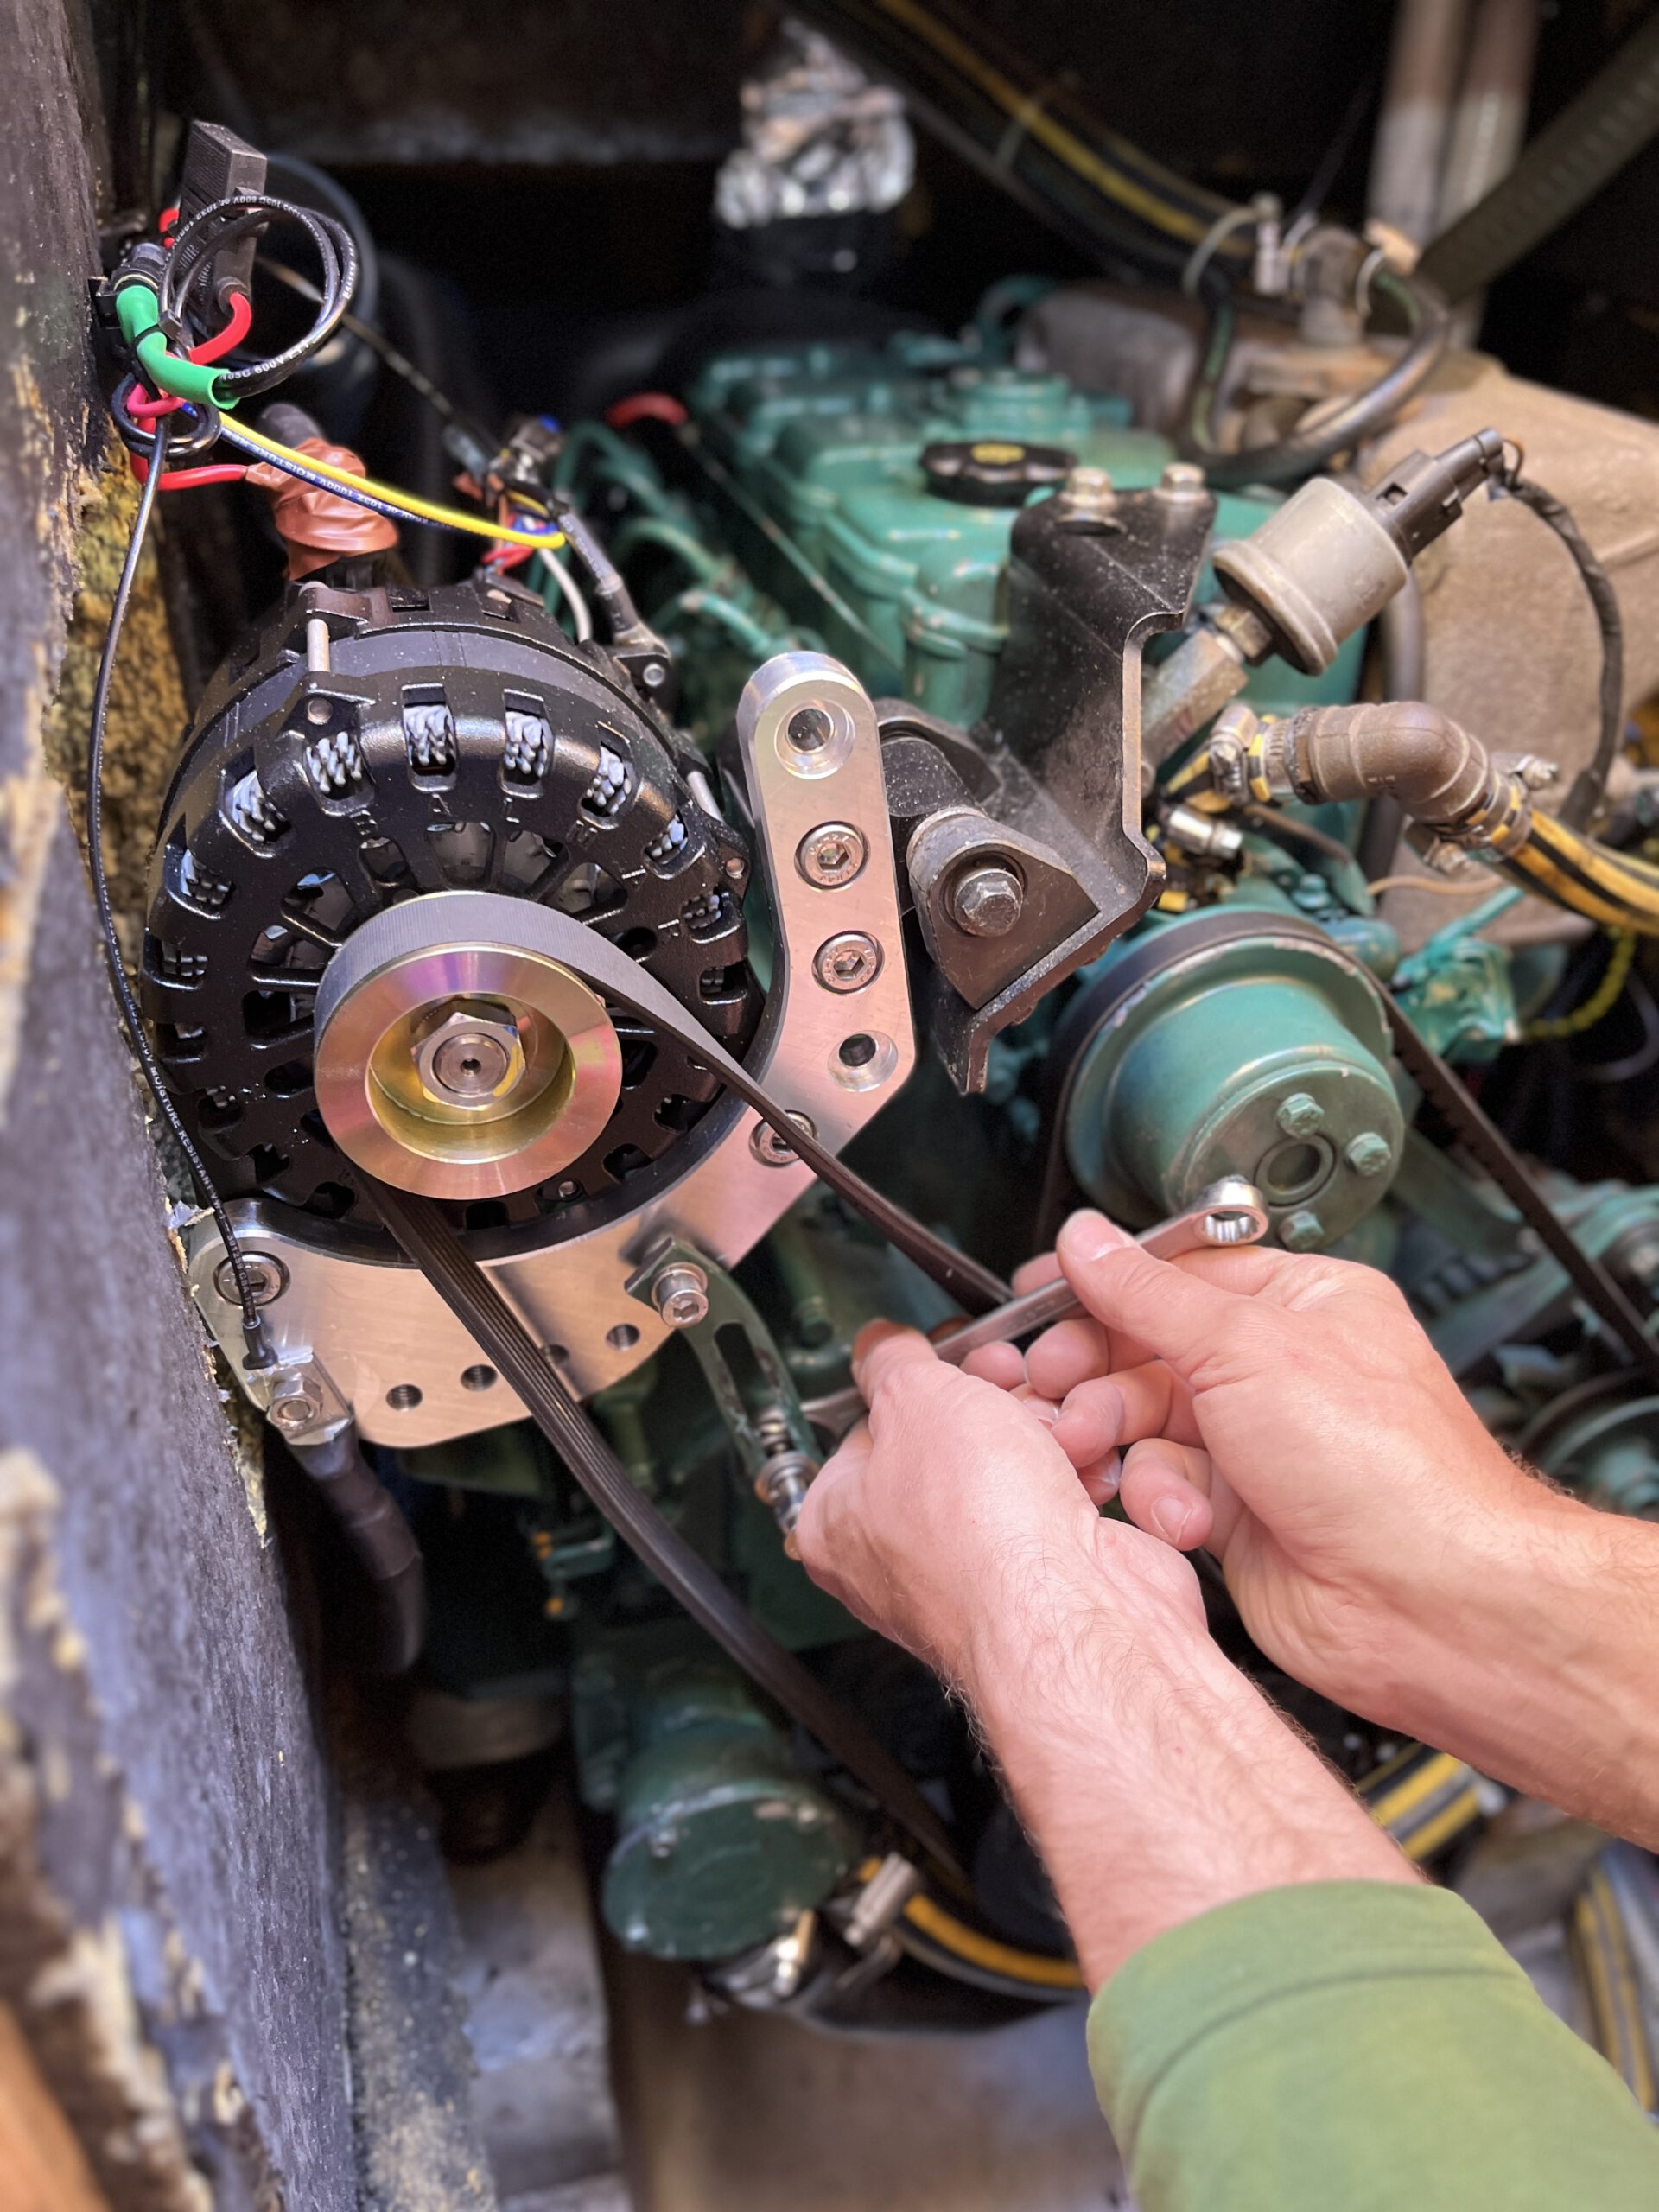
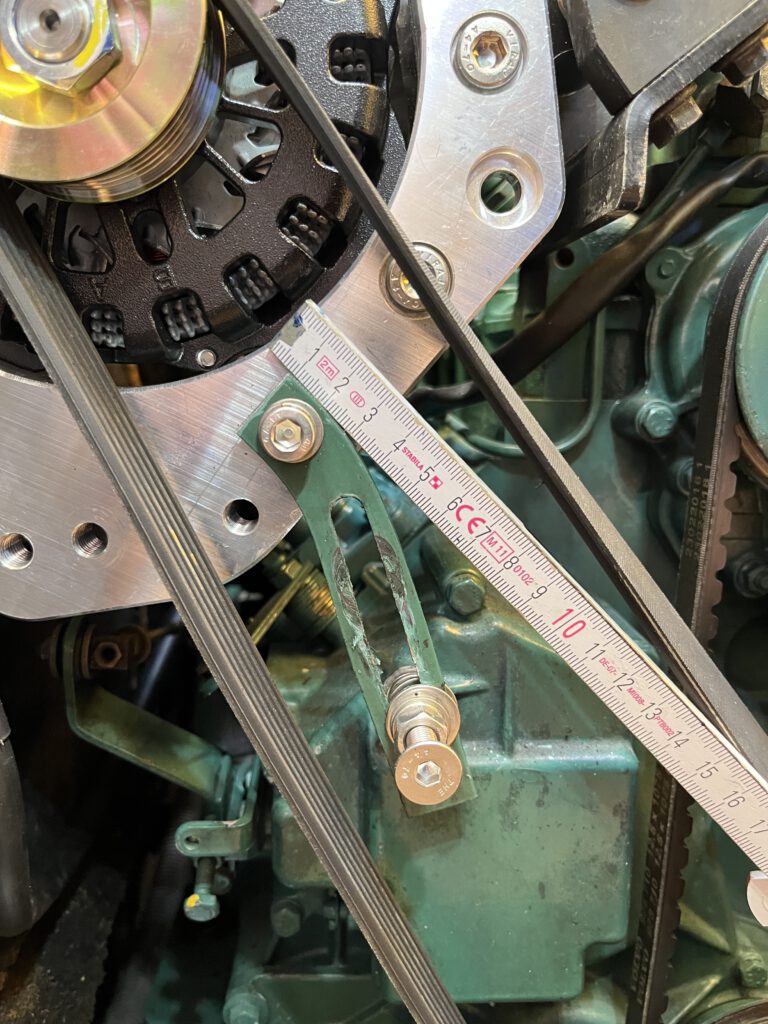
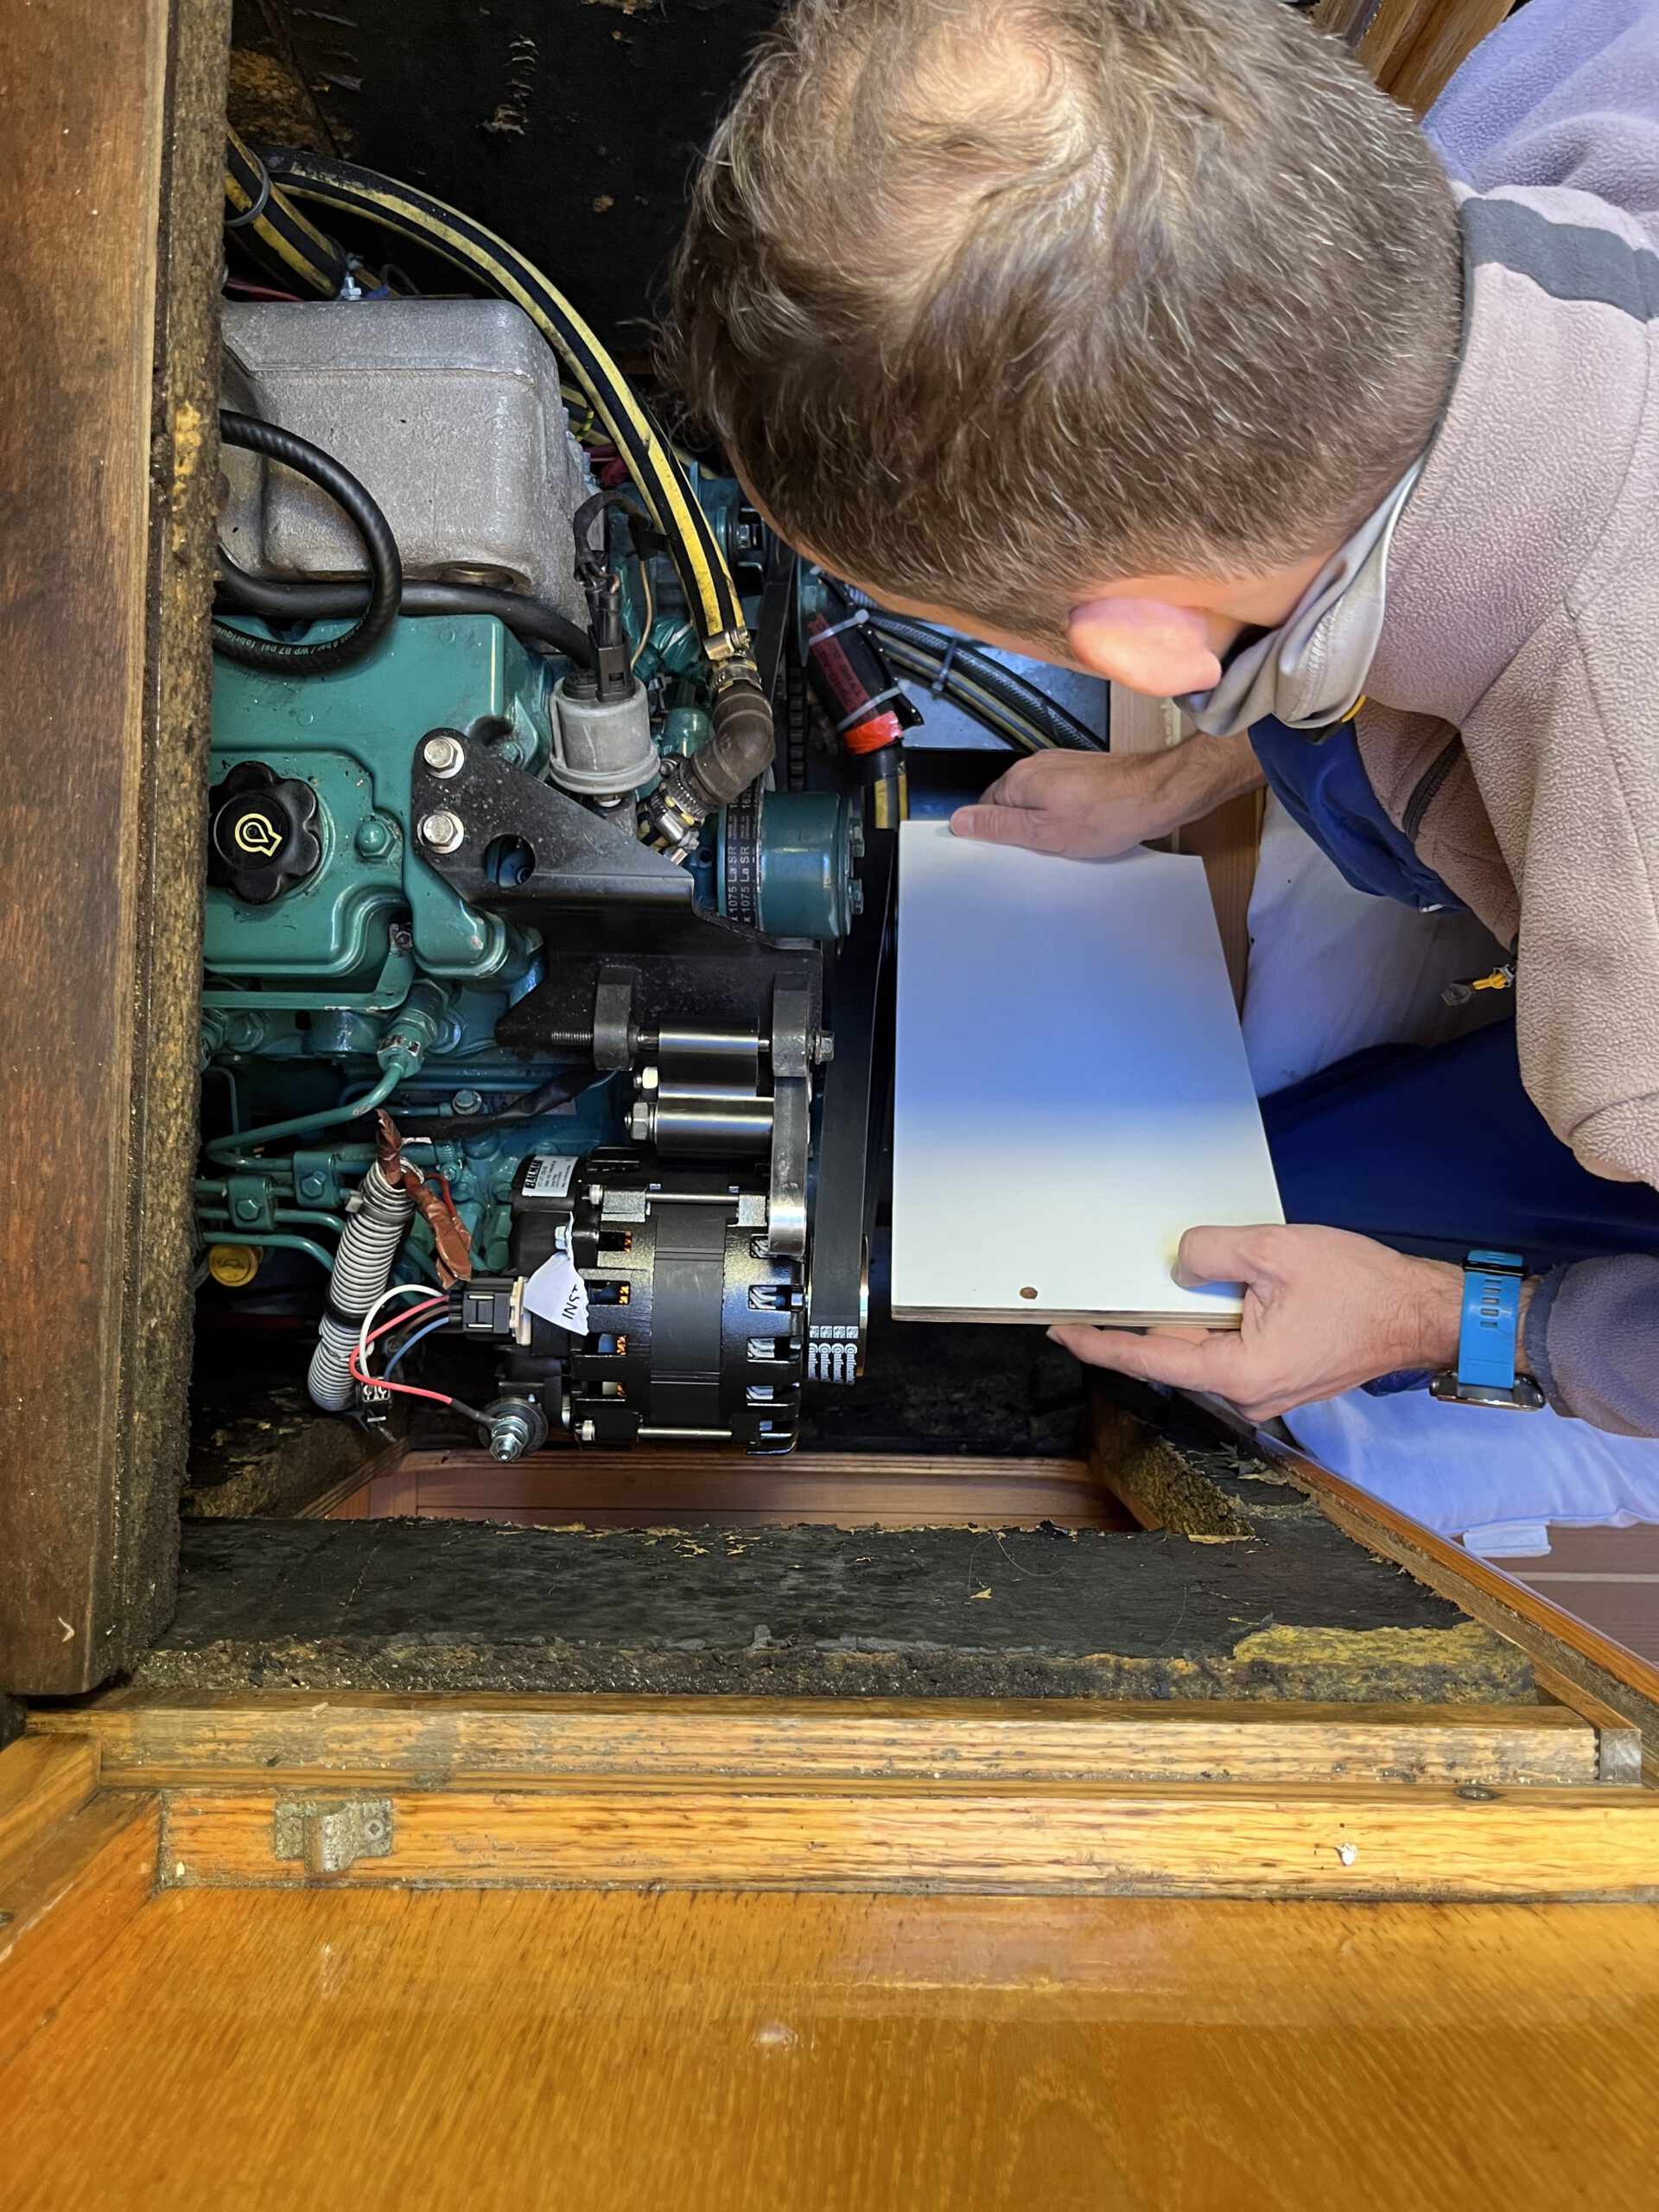
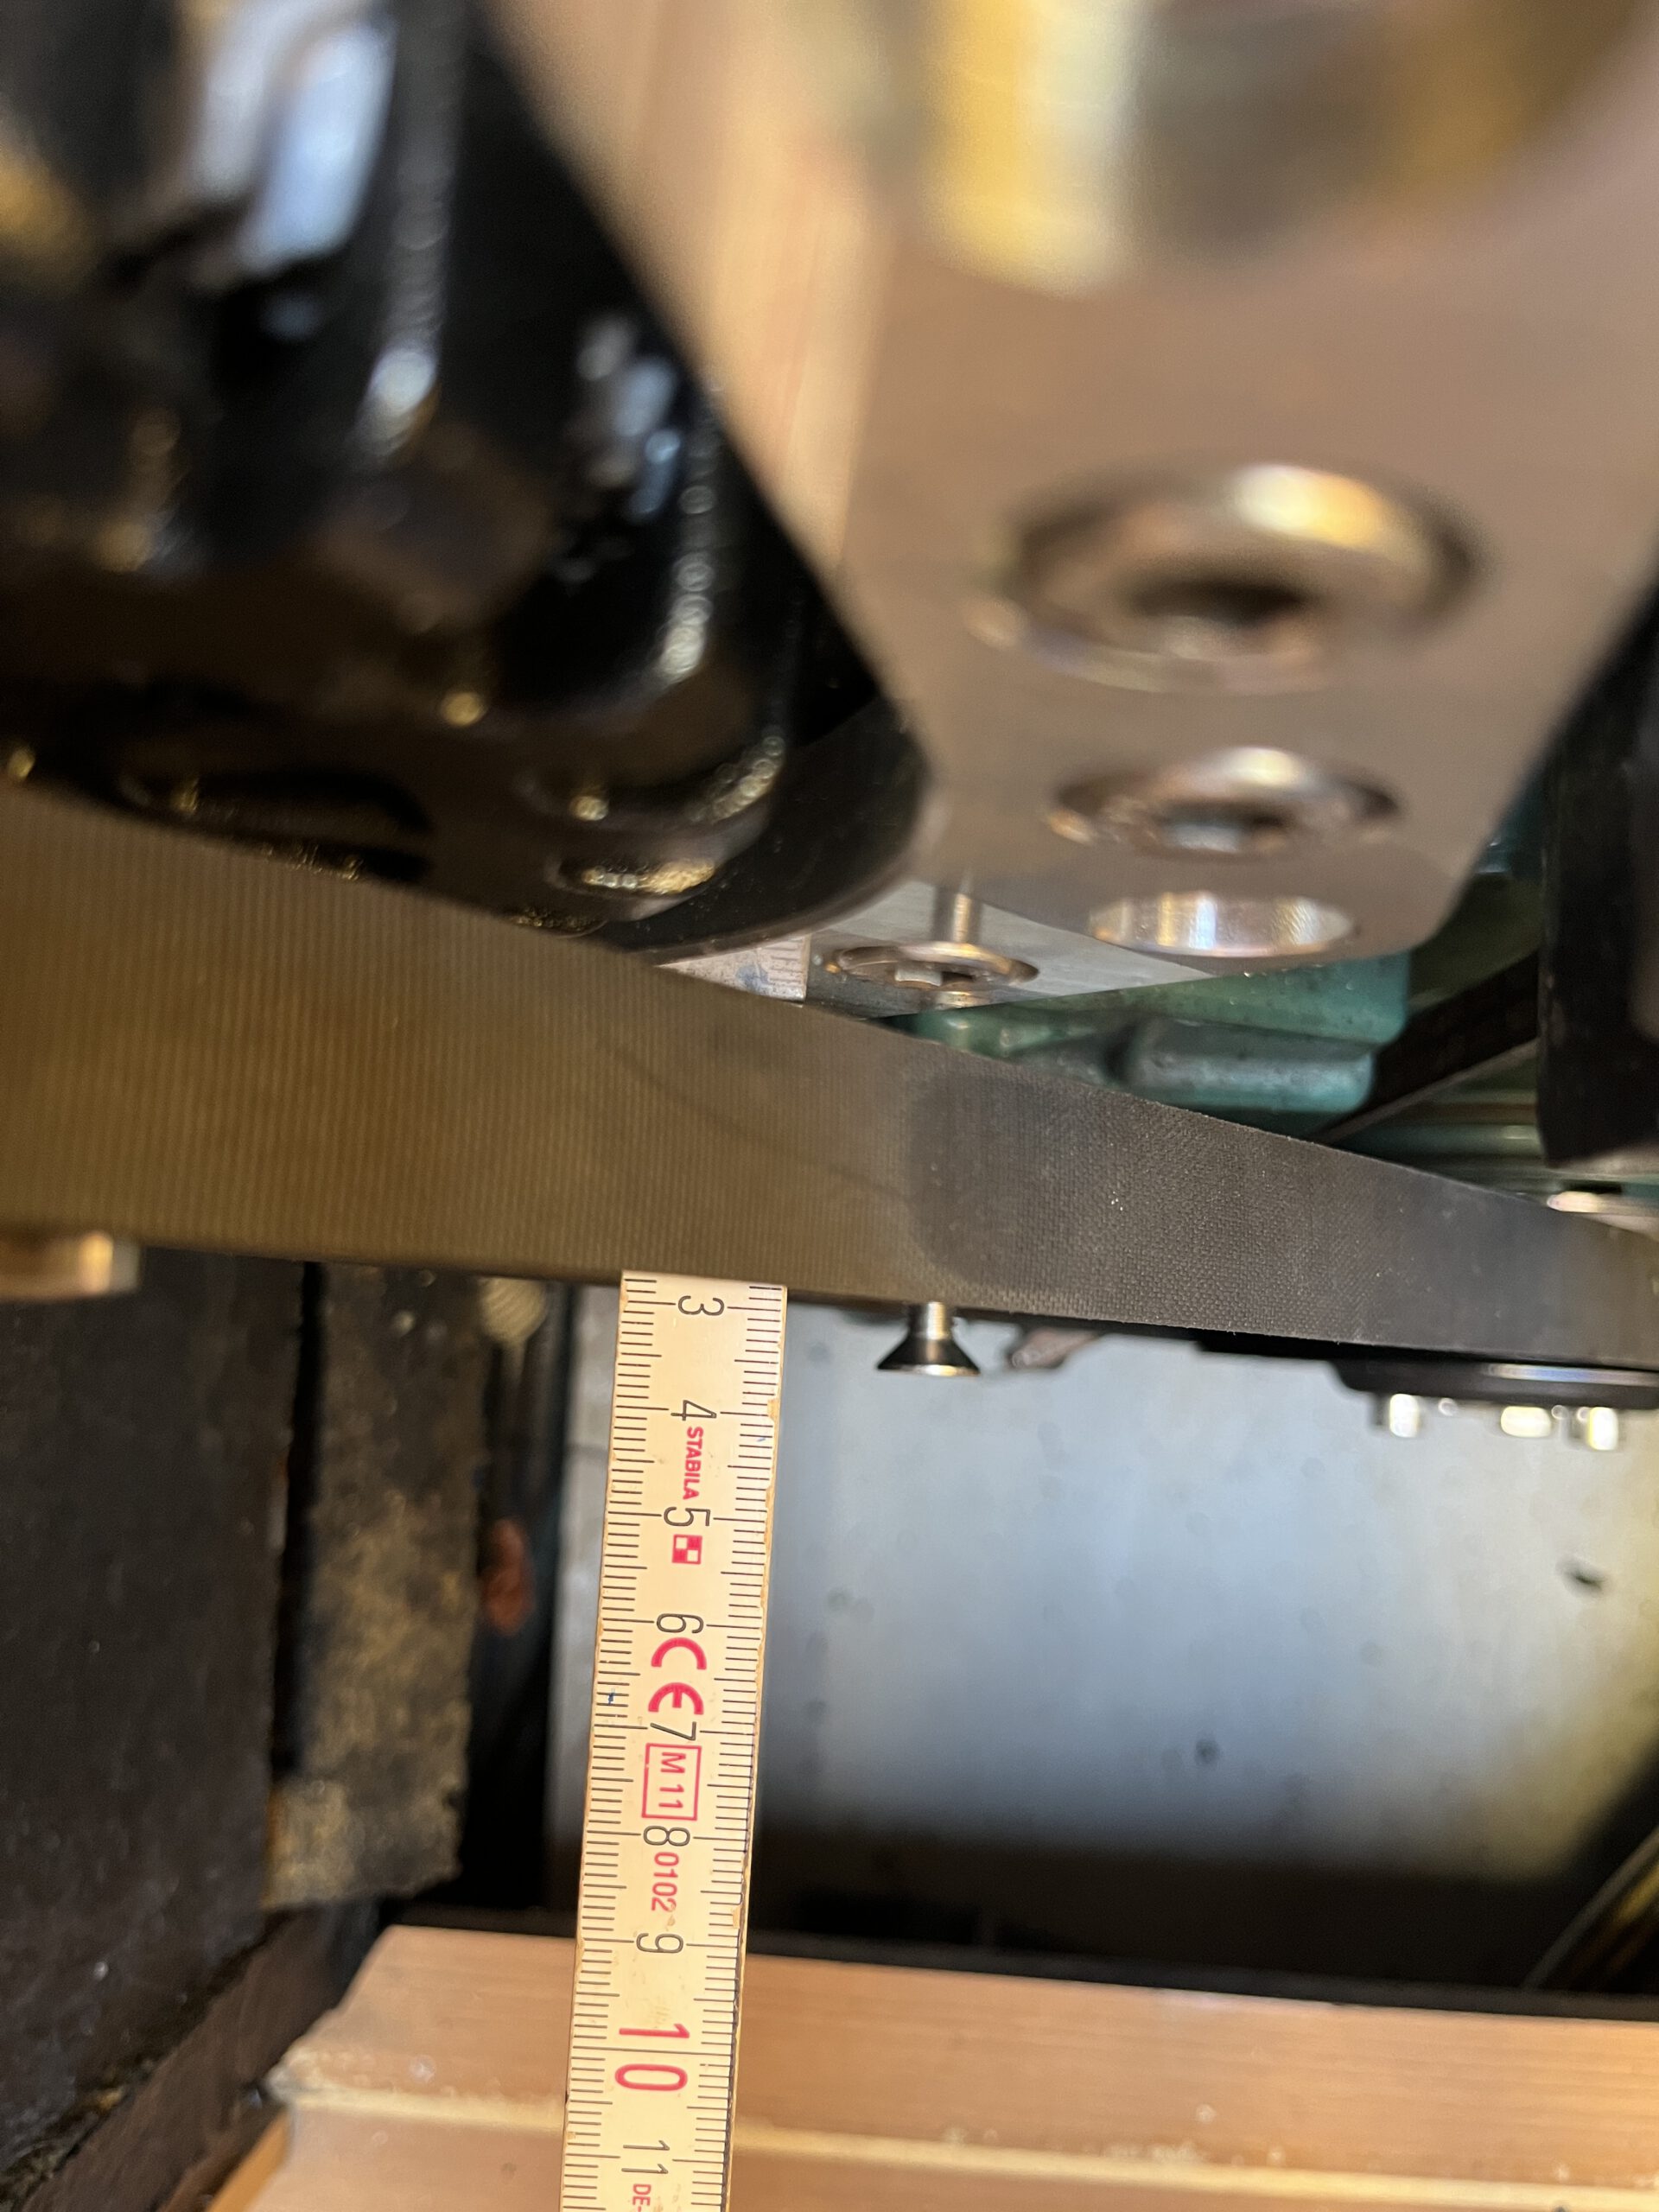
Step 5: Aligning the Drive, Belt, and Alternator 📐
Before adjusting the belt tension, it’s crucial to ensure that the drive, belt, and alternator are properly aligned. Misalignment could cause the belt to wear out or get damaged during charging, leading to decreased performance and potential system failure. We had to use what was availible on board to align the belt.
- Visually inspect the alignment of the alternator pulley with the engine pulley. The pulleys should be parallel to each other, and the belt should run straight between them.
- If you notice any misalignment, adjust the position of the alternator.
Step 6: Connecting the Negative Terminal
The Balmar alternator doesn’t have an internal isolation or negative terminal. The negative connection is on the case, so I connected the aluminum support of the alternator to the negative part of the batteries.
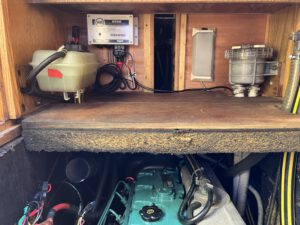
Step 7: Installing the Wakespeed Regulator
To achieve the most precise control over the charging process, I decided to use an external regulator. In order to avoid any interference between the alternator’s built-in regulator and the external regulator, I selected a Balmar alternator without an internal regulator (noIR). By opting for a noIR alternator, I ensured that the external regulator would solely manage the charging performance, allowing for optimal charging efficiency and better compatibility with the external Wakespeed regulator.
To regulate the output of the alternator, I decided to use an external Wakespeed regulator. I installed the regulator near the engine compartment and connected the wiring according to the provided map. I configured the regulator as a P-regulator, as specified by the Balmar alternator.
Step 7: Configuring the Wakespeed Regulator
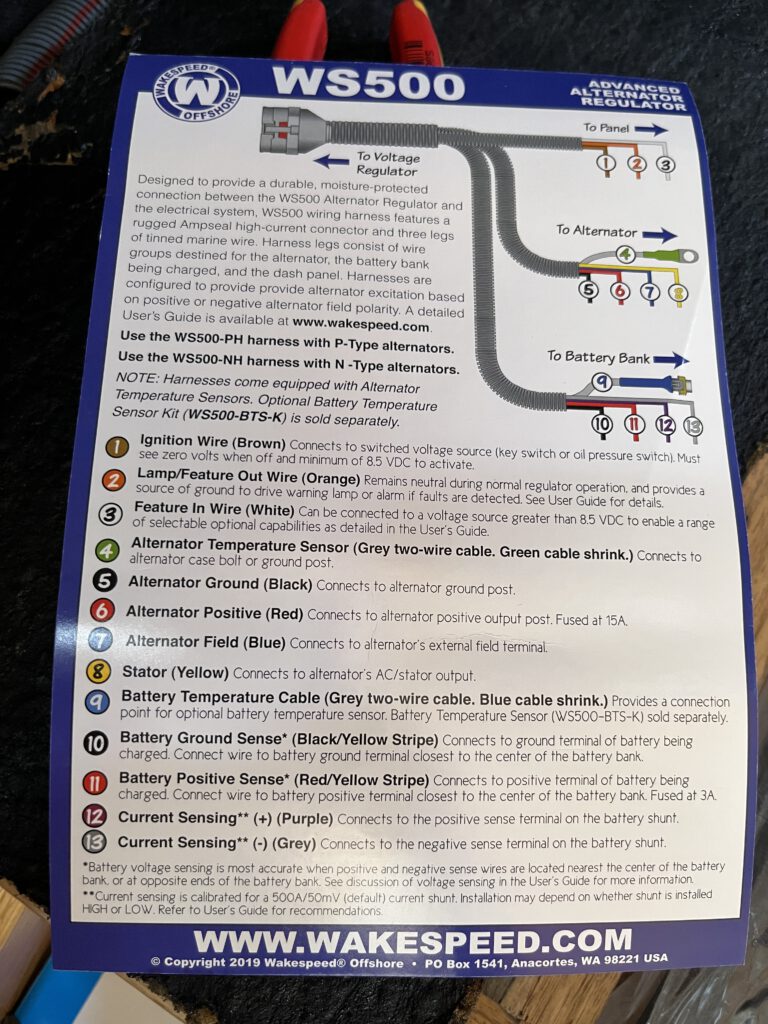
Wakespeed’s WS500 Advanced Alternator Regulator is a versatile and powerful solution for charging various battery types, including standard flooded (thin plate) and deep cycle flooded, Gel, standard AGM, Battle Born Li-lon, high-density AGM, and LiFeP04. With its built-in support for multiple battery technologies, the WS500 allows users to select the appropriate charging profile via onboard DIP switches.
Additionally, the WS500 regulator offers the option to upload pre-engineered configuration files tailored to a growing number of battery brands and chemistries, following the battery manufacturer’s charging recommendations. This can be done using the Wakespeed File Transfer Utility or the free Wakespeed Configuration App available for both Android and iOS devices.
To configure the WS500 regulator, you will need a Windows PC, a Type B USB cable, and access to the internet to download the configuration files. It’s important to note that configuring the regulator doesn’t require the WS500 to be installed in the vehicle or vessel, allowing for software and firmware upgrades to be performed anywhere.
To start the upgrade/configuration process, gather the following items:
- Windows-based computer with an available USB port
- Internet access to download the configuration .ZIP files
- High-quality Type B USB cable
Once you have everything ready, follow the provided guide to walk you through the upgrade/configuration process step by step from : https://www.wakespeed.com/product/ws500-advanced-alternator-regulator/#wc-tab-title-support
Step 8: Testing My Setup
After completing the installation and configuration, I tested my setup to ensure the alternator and regulator were working correctly and efficiently charging my LifePO4 batteries.
During the testing phase at various engine speeds, I observed that some adjustments to the charging curves were still necessary. Specifically, I wanted to reduce the charging output from the alternator at engine speeds below 1000 RPM.
Conclusion:
Installing a Balmar alternator and Wakespeed regulator on my aluminum boat was an exciting and educational experience. By following the steps outlined in this post, I successfully upgraded my boat’s charging system, allowing me to enjoy the full benefits of my LifePO4 batteries. If you’re considering a similar upgrade, I hope my experience will be helpful to you. 😊🌊


Hi Maria,
thanks for sharing your experience.
I have a question regarding the electrical connections of WS500, did you connect all the mentioned wires or only few them?
Hi Moheb, I connected all exept the 2 optional (Feature import and alarm)
Pingback: Belt drive challenges and solution with a powerful alternator on a boat engine - SV-Tatooine
Did you custom fabricate the part to adapt the flat belt pulley (black) to the original pulley? And where did you get the black pulley (do you have part number by any chance)? Thank you for documenting this — it’s extremely helpful! I am considering going down a similar path on a catamaran with two Volvo D2-55A engines.
I might have found it here while just searching for crankshaft pulley ribbed belt:
https://www.autodoc.co.uk/ridex/16147385
Sorry for the late response — I regret that I haven’t had much time to work on my website lately.
Here is the hardware in the optimal version:
Belt K6 pulley
Crankshaft pulley (e.g. RIDEX 3213B0018) https://www.autodoc.de/ridex/8095018 (VW/Audi)
Overrunning pulley EAN: 4059191654239 https://www.autodoc.de/ridex/13628581